Cadmus
Cadmus is a document reader for Kobo’s e-readers.
Documentation
This site is the primary source of documentation for Cadmus. Use the sidebar to navigate, or start at the overview for installation, usage, and workflows.
Supported firmwares
Any 4.X.Y firmware, with X ≥ 6, will do.
Supported devices
- Libra Colour.
- Clara Colour.
- Clara BW.
- Elipsa 2E.
- Clara 2E.
- Libra 2.
- Sage.
- Elipsa.
- Nia.
- Libra H₂O.
- Forma.
- Clara HD.
- Aura H₂O Edition 2.
- Aura Edition 2.
- Aura ONE.
- Glo HD.
- Aura H₂O.
- Aura.
- Glo.
- Touch C.
- Touch B.
Supported formats
- PDF, CBZ, FB2, MOBI, XPS, TXT, JPEG, JPG, PNG, WEBP and SVG via MuPDF.
- ePUB through a built-in renderer.
- DJVU via DjVuLibre.
Features
- Crop the margins.
- Continuous fit-to-width zoom mode with line preserving cuts.
- Rotate the screen (portrait ↔ landscape).
- Adjust the contrast.
- Define words using dictd dictionaries.
- Annotations, highlights and bookmarks.
- Retrieve articles from online sources through hooks.
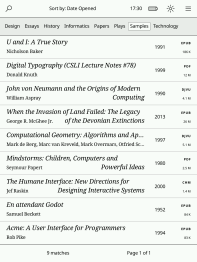
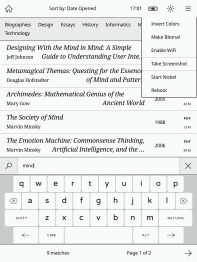
Screenshots


Acknowledgments
Cadmus is a fork of Plato, a document reader created by Bastien Dejean.
Installation
Cadmus comes in different packages. Pick the one that matches your needs.
Available packages
| Package | What’s included | Installs to |
|---|---|---|
KoboRoot.tgz | Cadmus only | /mnt/onboard/.adds/cadmus |
KoboRoot-nm.tgz | Cadmus + NickelMenu | /mnt/onboard/.adds/cadmus |
KoboRoot-test.tgz | Test build only | /mnt/onboard/.adds/cadmus-tst |
KoboRoot-nm-test.tgz | Test build + NickelMenu | /mnt/onboard/.adds/cadmus-tst |
Which one should I pick?
- Normal installs: Use
KoboRoot.tgzorKoboRoot-nm.tgz - If you use NickelMenu: Pick a package that includes it (
-nmversions) - Testing a new feature: Use test packages (
-testversions) for trying out changes that haven’t been released yet
First-time setup
- Go to the latest release.
- Download the package you want from the table above.
- Connect your Kobo to your computer via USB.
- Rename the downloaded file to
KoboRoot.tgz. - Copy that renamed file to
/mnt/onboard/.kobo/KoboRoot.tgzon the device. - Eject the device and reboot.
Note
You must rename the file to
KoboRoot.tgzbefore copying it to your Kobo. For example,KoboRoot-nm.tgzandKoboRoot-test.tgzwill not install until you rename them.
Updating
There are two ways to update Cadmus once it’s installed.
Wirelessly (OTA)
The easiest way — no computer needed, just WiFi. Open Main Menu → Check for Updates and follow the prompts. See OTA updates for details.
Via USB
You can also update by copying a new package over USB, the same way you did the first-time install.
- Connect your Kobo to your computer via USB.
- When Cadmus asks “Share storage via USB?”, tap Share.
- Download the package you want from the latest release.
- Copy it to
/mnt/onboard/.kobo/KoboRoot.tgzon your Kobo. - Eject and disconnect the USB cable.
Note
Always name the file
KoboRoot.tgzon the device, regardless of which package you downloaded (e.g.KoboRoot-nm.tgzmust be renamed).
Cadmus detects the file automatically and reboots your Kobo to install the update. You don’t need to do anything else.
Uninstalling
See Uninstalling Cadmus.
Test builds
First-time install
- Open the Cadmus GitHub Actions page.
- Select the run for the change you want to test.
- Download the
cadmus-kobo-test-<suffix>file.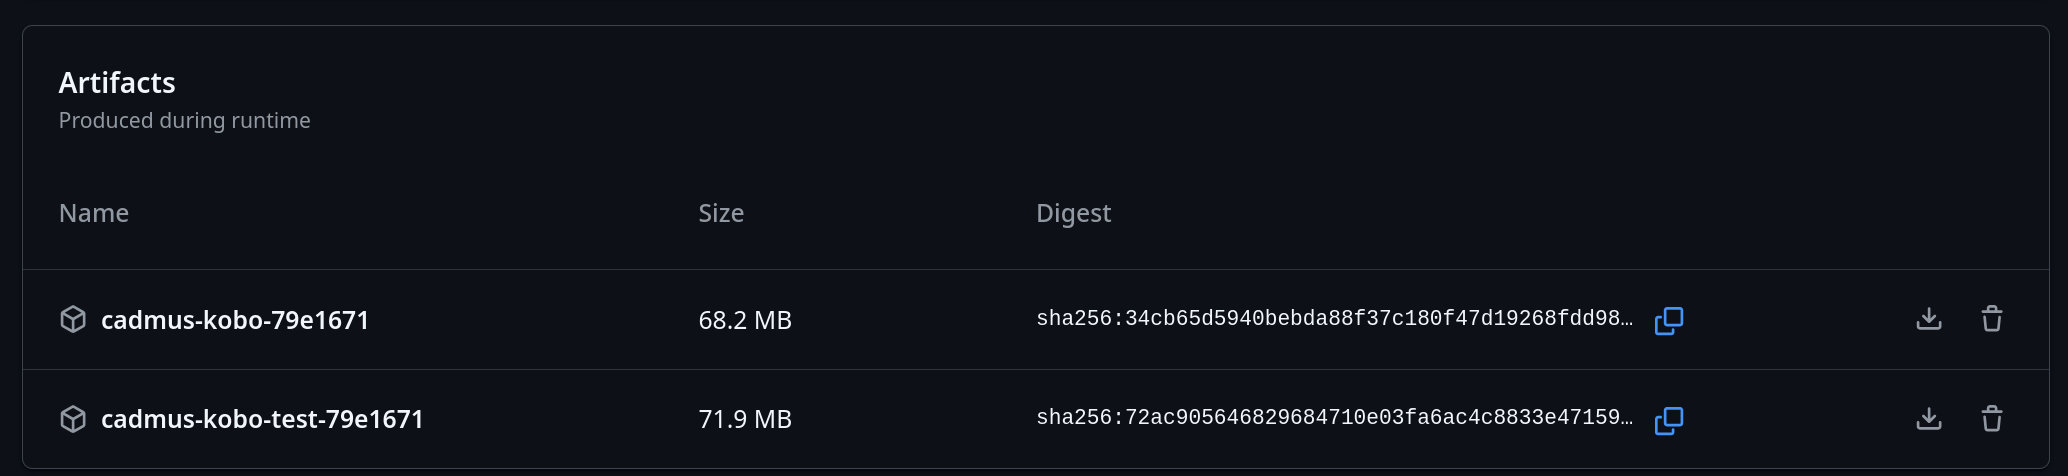
- Extract it and pick the package that matches your setup.
- Rename the selected file to
KoboRoot.tgz. - Copy that renamed file to:
/mnt/onboard/.kobo/KoboRoot.tgz - Eject the device and reboot.
Note
Test packages such as
KoboRoot-test.tgzandKoboRoot-nm-test.tgzmust be renamed toKoboRoot.tgzbefore you copy them to your Kobo.
Updating an existing test build
Use the OTA feature to download updates from a PR number directly on your device. This lets you test changes without connecting to a computer.
OTA updates
Once Cadmus is installed, you can update it wirelessly without connecting to a computer. The OTA (Over-The-Air) feature downloads updates directly from GitHub.
What you need
- A WiFi connection
Authentication
Main branch and PR builds require a GitHub account. Stable releases are public and need no authentication.
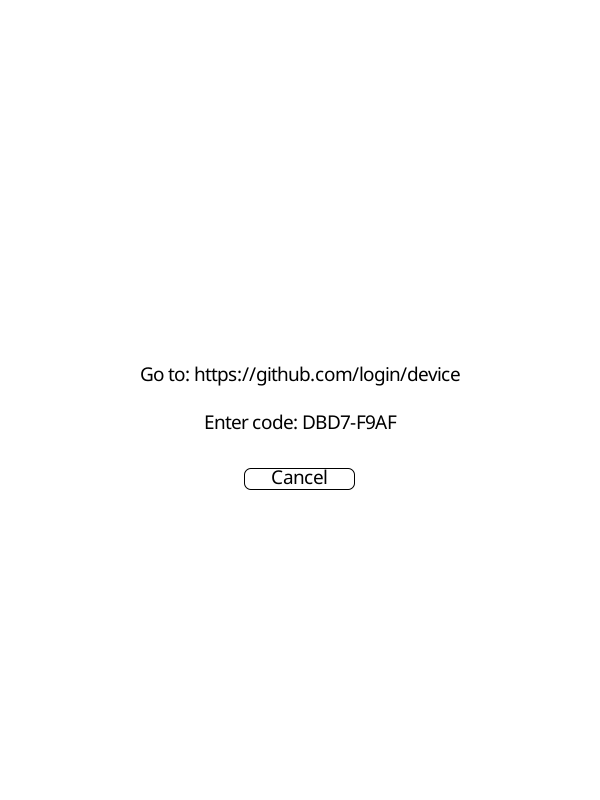
The first time you request a main branch or PR build, Cadmus will show a screen with a URL and a short code:
- Go to the URL shown on screen
- Enter the code shown on your device
- Sign in to GitHub and approve the request
Cadmus detects the approval automatically and starts the download. The token is saved to disk so you won’t need to sign in again.
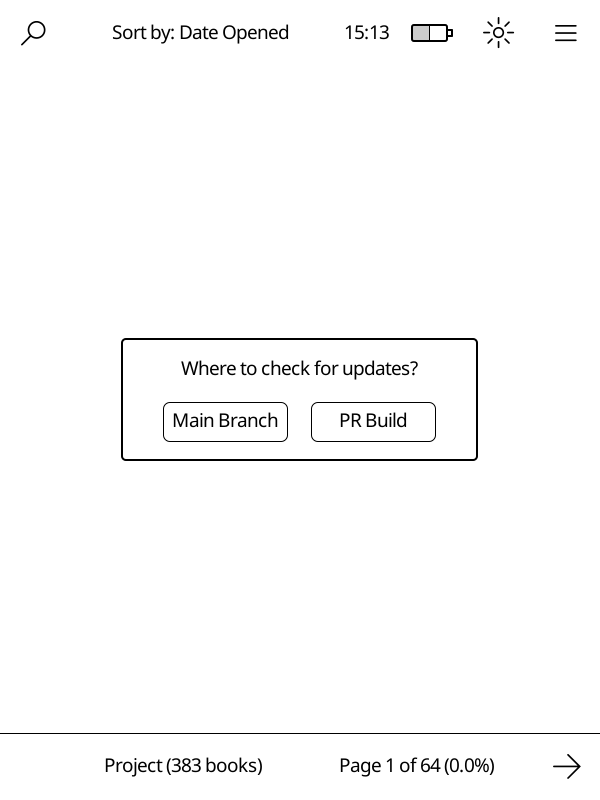 |  |
How to update
Open Main Menu → Check for Updates. You’ll see options for where to get the update from:
| Source | Description |
|---|---|
| Stable Release | Latest official release from GitHub |
| Main Branch | Latest development build (most recent changes) |
| PR Build | Test a specific pull request |
Note
The Stable Release option is not shown in test builds.
Updating from the main branch
Select Main Branch to get the most recent development build. This includes changes that have been merged but not yet released officially.
If you haven’t authenticated before, Cadmus will guide you through the GitHub sign-in process. See Authentication for details.
The update downloads from GitHub, installs automatically, and reboots the device to finish.
Before that reboot, Cadmus removes the files it previously installed so the new package can replace them cleanly. Your custom fonts, icons, and other user-added files will be preserved.
Testing a pull request
Select PR Build to try out a specific change before it’s released. Enter the PR number when prompted. If you haven’t authenticated before, Cadmus will guide you through the GitHub sign-in process. See Authentication for details.
Tip
Find the PR number in the GitHub URL. For example, in
github.com/OGKevin/cadmus/pull/42the PR number is 42.
Normal vs test builds
OTA works for both types of builds. The type you’re currently using determines what gets downloaded:
- Normal builds update to
KoboRoot.tgzin/mnt/onboard/.adds/cadmus - Test builds update to
KoboRoot-test.tgzin/mnt/onboard/.adds/cadmus-tst
See the available packages table for all options.
First-time setup
OTA only works for updating an existing installation. To install Cadmus for the first time, follow the installation guide or the test builds guide to copy a KoboRoot file via USB.
Troubleshooting
“Insufficient disk space” error
If Cadmus shows an error like “Insufficient disk space: need 100MB, have XMB” while downloading an update:
- Cadmus downloads update files into a
tmpfolder:- With SD card:
/mnt/sd/.cadmus/tmp(uses SD card space) - Without SD card:
/mnt/onboard/.adds/cadmus/tmp(uses internal storage)
- With SD card:
- If you see this error and have an SD card inserted, the card may be full
- If you do not have an SD card, free up space on internal storage by deleting books or other files you do not need
Manually install PR build
To manually install a PR build, follow these steps:
- Open the PR you want to install
- Press the checks tab

- Press the cargo job
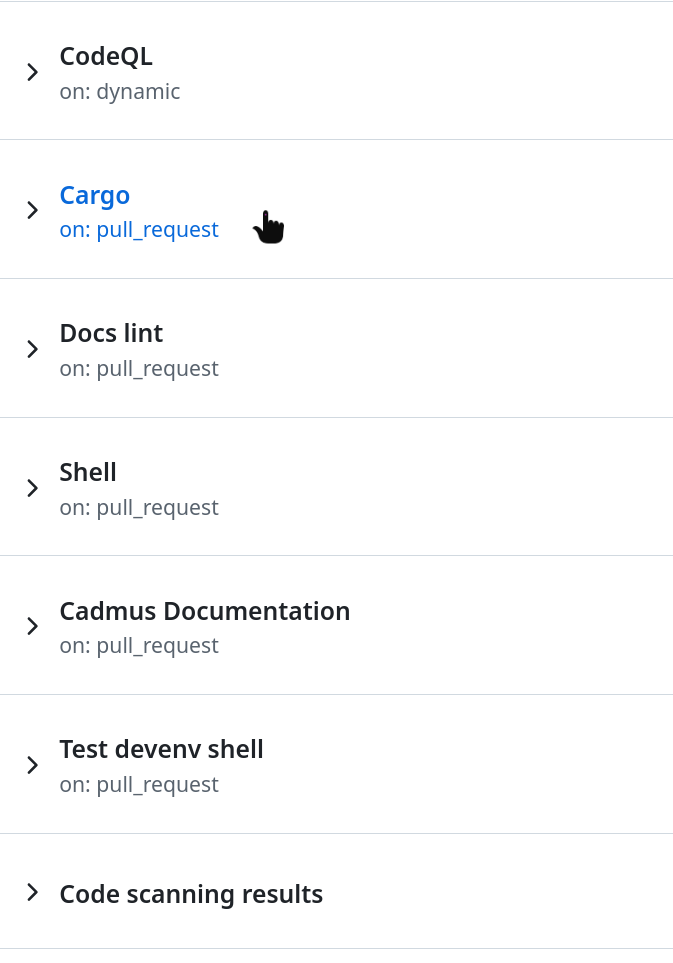
- Scroll down until you find the files
Afterward, follow the installation instructions accordingly.
Migrating from Plato
Cadmus is a fork of Plato and uses the same Settings.toml format, so
migrating is mostly a matter of copying your settings file across.
Copy your settings
| Build | Plato settings | Cadmus settings |
|---|---|---|
| Stable | /mnt/onboard/.adds/plato/Settings.toml | /mnt/onboard/.adds/cadmus/Settings.toml |
| Test | /mnt/onboard/.adds/plato/Settings.toml | /mnt/onboard/.adds/cadmus-tst/Settings.toml |
Copy the file as-is into the Cadmus folder so it is named Settings.toml (for example, /mnt/onboard/.adds/cadmus/Settings.toml or /mnt/onboard/.adds/cadmus-tst/Settings.toml).
The [[libraries]] section is the most important part, it tells Cadmus where your books live and drives the reading-progress import on
first launch. On first launch, Cadmus will move this file into its Settings/ folder automatically.
Note
If your SD card is already inserted when you upgrade, Cadmus automatically moves your settings, logs, and dictionaries to
/mnt/sd/.cadmus/(or/mnt/sd/.cadmus-tst/for test builds) on the next boot.
Note
If you insert an SD card after Cadmus has already run, the automatic migration will not run. You will need to copy your data manually — see Moving data to an SD card below.
[[libraries]]
name = "On Board"
path = "/mnt/onboard"
mode = "database"
Important
Make sure each
[[libraries]]entry has the correctpathandname. If a path doesn’t match what’s on disk, Cadmus skips that library’s import.
What happens on first launch
When Cadmus starts for the first time it automatically imports your data from each library listed in settings:
| Source | What’s imported |
|---|---|
.metadata.json | Book metadata (title, author, …) and reading progress |
.reading-states/<fp>.json | Reading progress for books not already covered by the above |
Both database mode and filesystem mode libraries are handled. Cadmus reads
.reading-states/ in all cases, so current page, bookmarks, and annotations
carry over regardless of which mode you used in Plato.
Note
The original
.metadata.jsonand.reading-states/files are not modified or deleted during import. Once you have confirmed everything looks right in Cadmus, you can safely delete them. Keeping these files means your Plato progress remains intact. If you decide to go back to Plato, you can do so without losing your original Plato reading states. Though keep in mind that any progress you make in Cadmus will not sync back to Plato.
Note
Cadmus also removes the
.thumbnail-previews/folder and regenerates thumbnails itself.
Re-running the import
If the import went wrong (for example, the library path was incorrect in settings), you can start it fresh:
-
Delete the Cadmus SQLite database:
Build Database path (with SD card) Database path (without SD card) Stable /mnt/sd/.cadmus/cadmus.sqlite/mnt/onboard/.adds/cadmus/cadmus.sqliteTest /mnt/sd/.cadmus-tst/cadmus.sqlite/mnt/onboard/.adds/cadmus-tst/cadmus.sqlite -
Restart Cadmus — the import will run again from scratch.
If something still looks wrong after re-running, check the logs for details. See Troubleshooting for where to find them.
Moving data to an SD card
If you insert an SD card after Cadmus has already run, you need to move your data manually. Cadmus will use the SD card for new data once it detects the card, but your existing files stay in internal storage until you move them.
Caution
Do these operations while Cadmus is not running!
In other words, do this while the Nickel/KOReader/etc is running.
-
Connect your Kobo to your computer
-
Copy the following from internal storage to the SD card:
What to move From (internal) To (SD card) Settings directory /mnt/onboard/.adds/cadmus/Settings//mnt/sd/.cadmus/Settings/Settings file /mnt/onboard/.adds/cadmus/Settings.toml/mnt/sd/.cadmus/Settings.tomlLogs /mnt/onboard/.adds/cadmus/logs//mnt/sd/.cadmus/logs/Dictionaries /mnt/onboard/.adds/cadmus/dictionaries//mnt/sd/.cadmus/dictionaries/Database /mnt/onboard/.adds/cadmus/cadmus.sqlite/mnt/sd/.cadmus/cadmus.sqliteNote
Use the test paths (
cadmus-tst/.cadmus-tst) if you are on a test build. -
Restart Cadmus. It will pick up the files from the SD card automatically.
Using Cadmus with KFMon
KFMon is a launcher that starts apps when you open certain icon files on your Kobo. If you already use KFMon with readers like Plato or KOReader, you may run into a conflict when you install Cadmus.
The problem
KFMon watches PNG files in the library. When Cadmus opens one of those watched PNG files — for example, while showing a cover or importing a book — KFMon thinks you tapped the icon and launches the matching reader. This can leave you with two readers running at the same time, such as both Plato and Cadmus.
The fix: add a Cadmus KFMon watch
Add a KFMon watch that points to Cadmus. This tells KFMon about Cadmus, so it blocks other launches while Cadmus is already running.
-
Place the Cadmus icon somewhere on your Kobo, for example:
/mnt/onboard/icons/cadmus.pngIf you don’t have an icon, create or copy a PNG image to use as the launcher icon.
-
Create a new file on your Kobo:
/mnt/onboard/.adds/kfmon/config/cadmus.ini -
Paste this into the file, changing the
filenamevalue to match your icon path:[watch] ; Absolute path of the icon to watch for ; At the time of writing, Cadmus does not ship a custom icon, so you ; need to create or copy a PNG file to use as the icon. filename = /mnt/onboard/icons/cadmus.png ; Absolute path of the command to launch when the icon is opened ; If you are using a test build, point this to /mnt/onboard/.adds/cadmus-tst/cadmus.sh action = /mnt/onboard/.adds/cadmus/cadmus.sh ; Label shown in a GUI frontend label = Cadmus ; Show this entry in GUI frontends hidden = 0 ; Prevent KFMon from launching another app while Cadmus is running block_spawns = 1 ; Do not update Nickel's database for this icon do_db_update = 0 -
Reboot your Kobo.
Important
The
block_spawns = 1line is the key setting. It stops KFMon from launching another reader while Cadmus is already open.
Pick one launcher method
Cadmus can be launched by either NickelMenu or KFMon, but try to avoid both at
once. If you use KFMon, install a non-NickelMenu package from the
Installation page (KoboRoot.tgz or KoboRoot-test.tgz)
instead of the KoboRoot-nm.tgz or KoboRoot-nm-test.tgz packages.
Using both can create duplicate icons and make conflicts harder to diagnose.
Temporarily disable KFMon
If you need to stop KFMon from launching anything for a short time — for
example, while troubleshooting — you can create a blank BLOCK file:
touch /mnt/onboard/.adds/kfmon/config/BLOCK
Remove the file when you want KFMon to work again:
rm /mnt/onboard/.adds/kfmon/config/BLOCK
Uninstalling Cadmus
To remove Cadmus from your Kobo:
-
Connect your Kobo to your computer via USB.
-
Delete the Cadmus folder from
.adds:Build Folder to delete Stable /mnt/onboard/.adds/cadmusTest /mnt/onboard/.adds/cadmus-tst -
If you installed a package that included NickelMenu, delete the Cadmus menu entry too:
Build NickelMenu entry to delete Stable /mnt/onboard/.adds/nm/cadmusTest /mnt/onboard/.adds/nm/cadmus-tst -
Eject the device and disconnect the USB cable.
Note
If you no longer need NickelMenu at all, you can remove it separately.
Settings
Cadmus reads settings from Settings/Settings-*.toml.
Settings can be changed via Main Menu → Settings, which opens the built-in settings editor.
Legend:
- ✏️ Editable in the settings editor
- 🔑 Required for feature to work
- 🧪 Only available in test builds
- 📱 Kobo
Example Full Config
Expand Me
# selected-library = 0
# Possible values: "English", "Russian".
keyboard-layout = "English"
frontlight = true
wifi = false
# Invert the display's colors.
inverted = false
# Handle the Sleep Cover event.
sleep-cover = true
# Automatically enters shared mode when connected to a computer.
auto-share = false
# Automatically synchronize the device time via NTP when WiFi connects.
# This will also set the correct timezone, it uses
# time.cloudflare.com and ipapi.co
auto-time = false
# Automatically adjust frontlight warmth based on sun position.
# Coordinates are auto-detected during time sync (via ipapi.co)
# unless manually specified below.
auto-frontlight = false
# Night brightness level when the sun is down (0.0 to 100.0).
auto-frontlight-night-brightness = 10
# Manual GPS coordinates override (latitude, longitude).
# auto-frontlight-manual-coordinates = [51.5074, -0.1278]
# Last auto-detected coordinates from time sync (written automatically).
# auto-frontlight-last-coordinates = [48.8566, 2.3522]
# Defines how the back and forward buttons are mapped to the
# *page forward* and *page backward* actions.
# Possible values: "natural", "inverted".
button-scheme = "natural"
# The number of minutes of inactivity after which a device
# will automatically go to sleep. *Zero* means *never*.
auto-suspend = 30.0
# The delay, in days, after which a suspended device
# will power off. *Zero* means *never*.
auto-power-off = 3.0
# Formats used for the clock and the clock's pop-up menu.
# The available specifiers are described at:
# https://docs.rs/chrono/latest/chrono/format/strftime/index.html
time-format = "%H:%M"
date-format = "%A, %B %-d, %Y"
# Appends the tapped external URLs to this file.
external-urls-queue = "bin/article_fetcher/urls.txt"
# The number of old versioned settings files to keep.
# Cadmus stores each version's settings in a separate file (e.g., Settings-v0.1.0.toml)
# for backward and forward compatibility across version upgrades.
# Files older than this count are automatically removed. Set to 0 to keep all files.
settings-retention = 3
# The number of database backup files to keep.
# A fresh backup is created on every startup. When the count exceeds this limit,
# the oldest backups are deleted automatically. Set to 0 to disable backups.
db-backup-retention = 2
# The preferred language for the user interface, using BCP 47 format.
locale = "en-US"
# What to show when Cadmus starts. Possible values: "home", "last-file".
startup-mode = "home"

[logging]
# Enable or disable structured JSON logging.
enabled = true
# Possible values: "trace", "debug", "info", "warn", "error".
level = "info"
# The number of rotated log files to keep. Use 0 to keep all files.
max-files = 3
# Directory for log files (relative to the installation directory).
directory = "logs"
# Optional OTLP endpoint for exporting logs when the build enables the otel feature.
# otlp-endpoint = "https://otel.example.com:4318"
# Optional Pyroscope server URL for continuous profiling when the build enables the profiling feature.
# Env var PYROSCOPE_SERVER_URL takes precedence over this value.
# pyroscope-endpoint = "http://pyroscope.example.com:4040"
# Capture kernel logs (requires test build with kobo feature).
# enable-kern-log = false
# Capture D-Bus signals via the built-in zbus-based DbusMonitorTask (requires test build with
# kobo feature; no external dbus-monitor tool is needed).
# enable-dbus-log = false

# You can create libraries by adding further [[libraries]] entries.
[[libraries]]
name = "On Board"
path = "/mnt/onboard"
# Possible values: "database", "filesystem".
mode = "database"
sort-method = "opened"
first-column = "title-and-author"
second-column = "progress"
thumbnail-previews = true

# This example fetcher retrieves articles through the *Wallabag* protocol.
# See `doc/ARTICLE_FETCHER.md` on how to configure it.
[[libraries.hooks]]
path = "Articles"
program = "bin/article_fetcher/article_fetcher"
sort-method = "added"
first-column = "title-and-author"
second-column = "progress"

# Remove this entry if you don't have an external card slot
# on your device.
[[libraries]]
name = "Removable"
path = "/mnt/sd"
mode = "database"
sort-method = "opened"
first-column = "title-and-author"
second-column = "progress"
thumbnail-previews = true

[[libraries]]
name = "Dropbox"
path = "/mnt/onboard/.kobo/dropbox"

[[libraries]]
name = "KePub"
path = "/mnt/onboard/.kobo/kepub"
# finished = "go-to-next"  # Optional: overrides reader.finished for this library

# Defines the images displayed when entering an intermission.
# Suspend supports "logo:", "cover:", "calendar:", "blank:",
# "blank-inverted:", and custom image paths.
# Power-off and share support "logo:", "cover:", "blank:",
# "blank-inverted:", and custom image paths.
# If a relative file path is given, it will be relative to
# the installation directory.
# Setting suspend to "calendar:" will show the calendar when the device
# wakes every 5 minutes to refresh it, then goes back to sleep.
[intermissions]
suspend = "logo:"
power-off = "logo:"
share = "logo:"

[home]
# Show the address bar that display the path of the current directory.
address-bar = false
# Show the navigation bar that displays the directory hierarchy.
navigation-bar = true
# The maximum number of levels shown above the current directory.
max-levels = 3
# The size limit, in bytes, of the trash. Once the limit is reached,
# documents will be automatically removed until the invariant is restored.
max-trash-size = 33_554_432

[reader]
# How to react when a book is finished.
# Possible values: "notify", "close", "go-to-next".
finished = "close"
# The action triggered when tapping the south-east corner.
# Possible values: "go-to-page", "next-page".
south-east-corner = "go-to-page"
# The action triggered when making bottom right corner gesture.
# Possible values: "toggle-dithered", "toggle-inverted".
bottom-right-gesture = "toggle-dithered"
# The action triggered when tapping the south strip.
# Possible values: "toggle-bars", "next-page".
south-strip = "toggle-bars"
# The action triggered when tapping the west strip.
# Possible values: "previous-page", "next-page", "none".
west-strip = "previous-page"
# The action triggered when tapping the east strip.
# Possible values: "previous-page", "next-page", "none".
east-strip = "next-page"
# The width ratio, relative to `min(W, H) / 2`, of the strip and corner touch regions.
# Launch the *Touch Events* application to display the current touch regions.
strip-width = 0.6
corner-width = 0.4
# The path for the user's custom font directory.
# Note: this does not exist by default.
font-path = "/mnt/onboard/fonts"
# The default serif font.
font-family = "Libertinus Serif"
# The default, minimum and maximum font sizes, in points.
font-size = 11.0
min-font-size = 5.5
max-font-size = 16.5
# The default text alignment.
# Possible values: "left", "right", "center", "justify".
text-align = "left"
# The default, minimum and maximum margin widths, in millimeters.
margin-width = 8
min-margin-width = 0
max-margin-width = 10
# The default line height, in ems.
line-height = 1.2
# Determine the scroll mode used for the fit-to-width zoom mode
# when opening a new document.
continuous-fit-to-width = true
# Whether to ignore the document's style sheets.
ignore-document-css = false
# The file extensions of the files that will automatically be dithered
# when opened for the first time.
dithered-kinds = ["cbz", "jpg", "png", "jpeg"]

[reader.paragraph-breaker]
# The penalty for hyphenated lines. The maximum value is 10_000.
hyphen-penalty = 50
# The stretch/shrink tolerance of inter-word spaces.
stretch-tolerance = 1.26

# Refresh the screen every `regular` page turns when the colors aren't inverted,
# and every `inverted` page turns when they are. *Zero* means *never*.
[reader.refresh-rate]
regular = 8
inverted = 2

# Override the refresh rates for individual file types.
# [reader.refresh-rate.by-kind]
# cbz = { regular = 1, inverted = 1 }

[import]
# When a document changes, re-extract its metadata.
sync-metadata = true
# The file extensions of the documents for which the metadata extraction
# process will occur.
metadata-kinds = ["epub", "pdf", "djvu"]
# The file extensions of the documents that will be considered during the
# import process.
allowed-kinds = ["djvu", "xps", "fb2", "txt", "pdf", "oxps", "cbz", "epub"]

[dictionary]
# The default font size and margin width, for the Dictionary application.
# The units are the same as in the `[reader]` section.
font-size = 11.0
margin-width = 4

[sketch]
# The path to a directory where the sketches will be saved.
# Relative paths are relative to the current library's path.
save-path = "Sketches"
# Create a notification when a sketch is successfully saved.
notify-success = true

[sketch.pen]
# The diameter of the pen tip, in pixels.
size = 2
# The current pen color.
# Possible values: 0 … 255.
color = { gray = 0 }
# Vary the diameter according to the pen's velocity.
dynamic = true
# The amplitude of the diameter variation when `dynamic` is set.
amplitude = 4.0
# The pen speeds, in pixels per seconds, that clamps the pen's speed.
# min-speed = 0.0
# max-speed = 3000.0

[calculator]
# The default font size and margin width, for the Calculator application.
# The units are the same as in the `[reader]` section.
font-size = 8.0
margin-width = 2
# The number of remembered inputs.
history-size = 4_096

[battery]
# Warn about the battery level being low, when the level
# goes below `warn` percents.
warn = 10.0
# Shut the device down when the battery level goes below
# `power-off` percents.
power-off = 3.0

[frontlight-levels]
intensity = 0.0
warmth = 0.0

# Over-The-Air (OTA) updates allow you to download and install
# Cadmus builds directly from GitHub.
# Authentication for main branch and PR builds is handled via GitHub device auth flow.
[ota]
General Settings
keyboard-layout
✏️
Keyboard layout to use for text input.
- Possible values:
"English","Russian".
keyboard-layout = "English"
sleep-cover
✏️
Handle the magnetic sleep cover event.
sleep-cover = true
auto-share
✏️
Automatically enter shared mode when connected to a computer, skipping the “Share storage via USB?” prompt.
Tip
Turn this on if you update Cadmus via USB often — you won’t have to confirm the sharing dialog each time you plug in.
auto-share = false
auto-time
✏️
Automatically synchronize the device time via NTP when WiFi connects. This will also set the correct timezone. Uses time.cloudflare.com and ipapi.co.
auto-time = false
auto-frontlight
✏️
Automatically adjust the frontlight warmth and brightness based on the sun’s position at the device’s location.
- During the day warmth is at its minimum.
- Around sunrise and sunset warmth ramps gradually between zero and full.
- After sunset brightness is reduced to
auto-frontlight-night-brightnessand warmth stays at its maximum until sunrise.
Coordinates are auto-detected during each time sync (via ipapi.co) and stored in auto-frontlight-last-coordinates. Set auto-frontlight-manual-coordinates to override the detected location.
auto-frontlight = false
auto-frontlight-night-brightness
✏️
Frontlight brightness level (0.0–100.0) applied when the sun is below the horizon.
This setting is optional. When not set, a default of 1.0 is used.
auto-frontlight-night-brightness = 10.0
auto-frontlight-manual-coordinates
✏️
GPS coordinates [latitude, longitude] to use for sun-position calculations instead of the auto-detected location. Takes priority over auto-frontlight-last-coordinates.
This setting is optional.
auto-frontlight-manual-coordinates = [51.5074, -0.1278]
auto-frontlight-last-coordinates
GPS coordinates [latitude, longitude] last detected during a time sync. Written automatically — do not edit this by hand; set auto-frontlight-manual-coordinates to override the location instead.
This setting is optional and managed automatically.
# auto-frontlight-last-coordinates = [48.8566, 2.3522]
auto-suspend
✏️
Number of minutes of inactivity after which the device will automatically go to sleep.
- Zero means never.
auto-suspend = 30.0
auto-power-off
✏️
Delay in days after which a suspended device will power off.
- Zero means never.
auto-power-off = 3.0
button-scheme
✏️
Defines how the back and forward buttons are mapped to page forward and page backward actions.
- Possible values:
"natural","inverted".
button-scheme = "natural"
locale
✏️
The preferred language for the user interface, using BCP 47 format (e.g., "en-US", "de-DE").
This setting is optional. When not set, en-GB is used.
locale = "en-GB"
startup-mode
✏️
What to show when Cadmus starts.
"home"— open the home screen (default)."last-file"— re-open the last book you were reading. If there is no unfinished book in the selected library, the home screen is shown instead.
startup-mode = "home"
Reader
Settings that control the reading experience.
reader.finished
✏️
What to do when you finish reading a book.
Possible values:
"notify"(show a notification)"close"(close the book and go back)"go-to-next"(open the next book in the library).
[reader]
finished = "close"
reader.dithered-kinds
✏️
File extensions rendered with dithering by default.
[reader]
dithered-kinds = ["cbz", "png", "jpg", "jpeg", "webp"]
Libraries
✏️
Document library configuration. Each library has a name, path, and mode.
[[libraries]]
name = "On Board"
path = "/mnt/onboard"
mode = "database"
libraries.name
✏️
Display name for the library.
libraries.path
✏️
Directory path containing documents.
libraries.mode
✏️
Library indexing mode.
- Possible values:
"database","filesystem".
libraries.finished
✏️
Override the reader.finished setting for this specific library.
When set, this takes precedence over the global reader setting.
Possible values:
"notify""close""go-to-next".- Leave unset to inherit the global
reader.finishedsetting.
[[libraries]]
name = "KePub"
path = "/mnt/onboard/.kobo/kepub"
finished = "go-to-next"
Intermissions
✏️
Defines the images displayed when entering an intermission state.
[intermissions]
suspend = "logo:"
power-off = "logo:"
share = "logo:"
intermissions.suspend
✏️
Image displayed when the device enters sleep mode.
Setting this to "calendar:" also enables the calendar refresh: every 5
minutes, the device wakes, shows the calendar, and then goes back to sleep
automatically.
- Possible values:
"logo:"(built-in logo),"cover:"(current book cover),"calendar:"(built-in calendar), or a path to a custom image file.
intermissions.power-off
✏️
Image displayed when the device powers off.
- Possible values:
"logo:"(built-in logo),"cover:"(current book cover), or a path to a custom image file.
intermissions.share
✏️
Image displayed when entering USB sharing mode.
- Possible values:
"logo:"(built-in logo),"cover:"(current book cover), or a path to a custom image file.
Import
These settings control how Cadmus imports documents from your device. They are available in the Settings → Import menu.
Import scanning happens automatically on startup using incremental file checking — files are only re-scanned if their modification time or size has changed since the last import.
To trigger a full re-scan of all files regardless of cached values, use the Force Full Import action button in the Import settings category.
import.sync-metadata
✏️
Re-extract metadata (title, author, etc.) whenever a document changes.
[import]
sync-metadata = true
import.metadata-kinds
File extensions of documents whose metadata is extracted during import.
[import]
metadata-kinds = ["epub", "pdf", "djvu"]
import.allowed-kinds
✏️
File extensions of documents considered during the import process.
[import]
allowed-kinds = ["djvu", "xps", "fb2", "txt", "pdf", "oxps", "cbz", "epub"]
OTA
The OTA feature downloads builds from GitHub.
Authentication for main branch and PR builds uses GitHub device auth flow.
When you select a build that requires authentication,
Cadmus will display a short code and a URL. Visit
github.com/login/device on any device, enter the code, and Cadmus will
automatically continue the download once you authorize.
The token is saved to disk after the first authorization so you will not be prompted again on subsequent downloads.
For step-by-step instructions with screenshots, see the OTA updates guide.
Telemetry
Cadmus writes JSON logs to disk. When the build enables the tracing feature, it
can also export logs to an OpenTelemetry endpoint.
These settings are available in the Settings → Telemetry menu.
Important
Changes to these settings only take effect after restarting Cadmus. The application initializes telemetry on startup.
logging
[logging]
enabled = true
level = "info"
max-files = 3
directory = "logs"
# otlp-endpoint = "https://otel.example.com:4318"
logging.enabled
✏️
Enable or disable structured JSON logging.
[logging]
enabled = true
logging.level
✏️
Minimum log level to record.
- Possible values:
"trace","debug","info","warn","error".
[logging]
level = "info"
logging.max-files
Number of log files to keep. Only the most recent N files are kept — older ones are deleted automatically when Cadmus starts.
- Default:
3 - Set to
0to keep all log files.
[logging]
max-files = 3
logging.otlp-endpoint
✏️ (only when the tracing feature is enabled)
Optional OTLP endpoint for exporting logs to an OpenTelemetry collector.
[logging]
otlp-endpoint = "https://otel.example.com:4318"
Environment override:
OTEL_EXPORTER_OTLP_ENDPOINTtakes precedence overlogging.otlp-endpoint.
logging.pyroscope-endpoint
✏️ (only when the profiling feature is enabled)
Optional Pyroscope server URL for continuous profiling. When set, Cadmus starts both a heap profiling agent (via jemalloc) and a CPU profiling agent (via pprof) that push profiles to this endpoint.
[logging]
pyroscope-endpoint = "http://localhost:4040"
Environment override:
PYROSCOPE_SERVER_URLtakes precedence overlogging.pyroscope-endpoint.
logging.enable-kern-log
🧪 📱 ✏️
Captures kernel logs via logread -F and forwards them to structured logging
with the target cadmus_core::logging:kern.
[logging]
enable-kern-log = false
logging.enable-dbus-log
🧪 📱 ✏️
Captures D-Bus signals via the built-in zbus-based DbusMonitorTask and forwards them to structured logging.
[logging]
enable-dbus-log = false
Settings Retention
Cadmus stores each version’s settings in a separate file in the Settings/ directory (for example, Settings-v1.2.3.toml).
This ensures backward and forward compatibility when you upgrade.
settings-retention
Number of recent version settings files to keep. Only the most recent N version files are kept. When a new version is saved, older versions beyond this limit are deleted automatically.
- Default:
3 - Set to
0to keep all version files
settings-retention = 3
db-backup-retention
Number of database backups to keep. When a new backup is created and the total would exceed this limit, the oldest backups are deleted automatically.
- Default:
2 - Set to
0to disable backups entirely.
See Database Backup for more details.
db-backup-retention = 2
User Interface
This section explains the different parts of Cadmus you interact with while reading and managing your books.
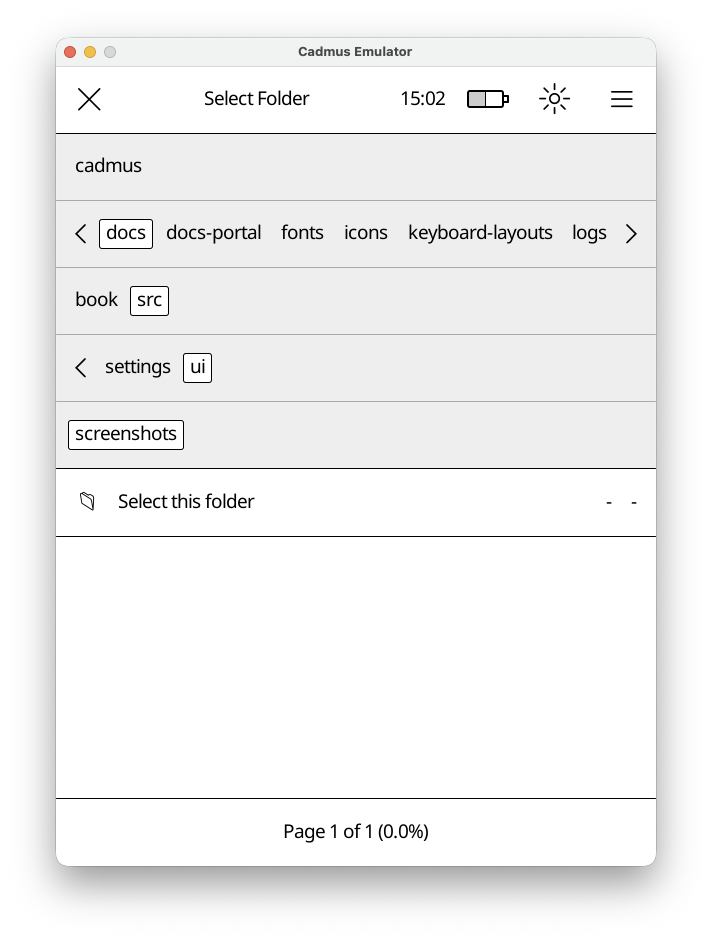
File Chooser
The file chooser helps you pick files or folders. It appears when you need to select a file or folder. e.g to pick a screen saver.
How It Works
The file chooser has three main parts:
- Top Bar - Shows what you’re selecting (“Select File”, “Select Folder”, etc.) and a close button
- Navigation Bar - Shows folders you can tap to browse deeper
- File List - Shows files in the current folder (or a special “Select this folder” option)
Navigation
Tap any folder name in the navigation bar to open it. The bar expands automatically if there are many folders. Tap and drag the separator line below the folders to resize the navigation area.
Selection Modes
The file chooser adapts based on what you need:
- File selection mode
- Folder selection mode
- File or folder selection mode
The title will indicate the mode.
Keyboard
The on-screen keyboard lets you type text for searches, dictionary lookups, and other input fields.
Basics
- Lock modifier keys — Tap ALT or SHIFT twice to lock them on.
- Combine key (CMB) — Press CMB followed by two keys to type accented or
special characters (see Combination Sequences
below). For example,
CMB o eproduces œ. - Delete / motion keys — Tap and hold to act on whole words instead of individual characters.
- Keyboard layouts — Tap and hold the space bar to switch layouts.
Inputting Accented Characters
Cadmus supports these through combination sequences using the CMB key. See Combination Sequences.
How to type an accented character
- Press the CMB key.
- Press the base letter (e.g.
e). - Press the accent modifier (e.g.
'for acute).
Example: CMB e ' produces é.
Combination Sequences
Press CMB followed by the two keys listed below to produce the corresponding character.
| Keys | Result | Keys | Result | Keys | Result | Keys | Result |
|---|---|---|---|---|---|---|---|
a ' | á | A ' | Á | a `` | à | A `` | À |
e ' | é | E ' | É | e `` | è | E `` | È |
i ' | í | I ' | Í | i `` | ì | I `` | Ì |
o ' | ó | O ' | Ó | o `` | ò | O `` | Ò |
u ' | ú | U ' | Ú | u `` | ù | U `` | Ù |
y ' | ý | Y ' | Ý | u " | ű | U " | Ű |
a ^ | â | A ^ | Â | o " | ő | O " | Ő |
e ^ | ê | E ^ | Ê | a : | ä | A : | Ä |
i ^ | î | I ^ | Î | e : | ë | E : | Ë |
o ^ | ô | O ^ | Ô | i : | ï | I : | Ï |
u ^ | û | U ^ | Û | o : | ö | O : | Ö |
w ^ | ŵ | W ^ | Ŵ | u : | ü | U : | Ü |
y ^ | ŷ | Y ^ | Ŷ | y : | ÿ | ||
a ~ | ã | A ~ | Ã | c , | ç | C , | Ç |
o ~ | õ | O ~ | Õ | c ' | ć | C ' | Ć |
n ~ | ñ | N ~ | Ñ | z ' | ź | Z ' | Ź |
a ; | ą | A ; | Ą | s ' | ś | S ' | Ś |
e ; | ę | E ; | Ę | n ' | ń | N ' | Ń |
z . | ż | Z . | Ż | t h | þ | T h | Þ |
a o | å | A o | Å | l / | ł | L / | Ł |
d / | đ | D / | Đ | o / | ø | O / | Ø |
o e | œ | O e | Œ | a e | æ | A E | Æ |
s s | ß | S s | ẞ | m u | µ | l - | £ |
p p | ¶ | s o | § | o _ | º | a _ | ª |
o o | ° | e = | € | o r | ® | o c | © |
o p | ℗ | t m | ™ | ] ] | ⟧ | [ [ | ⟦ |
| - | † | | = | ‡ | - , | ¬ | ~ ~ | ≈ |
< < | « | > > | » | ! ! | ¡ | ? ? | ¿ |
. - | · | . = | • | . > | › | . < | ‹ |
' 1 | ′ | ' 2 | ″ | + - | ± | - : | ÷ |
< = | ≤ | > = | ≥ | = / | ≠ | % o | ‰ |
# f | ♭ | # n | ♮ | # s | ♯ | ||
1 2 | ½ | 1 3 | ⅓ | 2 3 | ⅔ | 1 4 | ¼ |
3 4 | ¾ | 1 5 | ⅕ | 2 5 | ⅖ | 3 5 | ⅗ |
4 5 | ⅘ | 1 6 | ⅙ | 5 6 | ⅚ | 1 8 | ⅛ |
3 8 | ⅜ | 5 8 | ⅝ | 7 8 | ⅞ |
Custom Keyboard Layouts
Keyboard layouts are defined as JSON files with the following structure:
- name — Display name shown in the keyboard layouts menu.
- outputs — List of output keys for each modifier combination (none, shift, alt, shift+alt).
- keys — Description of each key. Special key names: Shift (Sft), Return (Ret), Alternate (Alt), Combine (Cmb), MoveFwd (MoveF, MF), MoveBwd (MoveB, MB), DelFwd (DelF, DF), DelBwd (DelB, DB), Space (Spc). Use ▢ to mark output keys.
- widths — Width/height ratio for each key. The key gap ratio is 0.06.
Settings
The settings editor lets you change how Cadmus works. Open it from Main Menu → Settings.
Settings are organised into tabs — tap a category to open it.
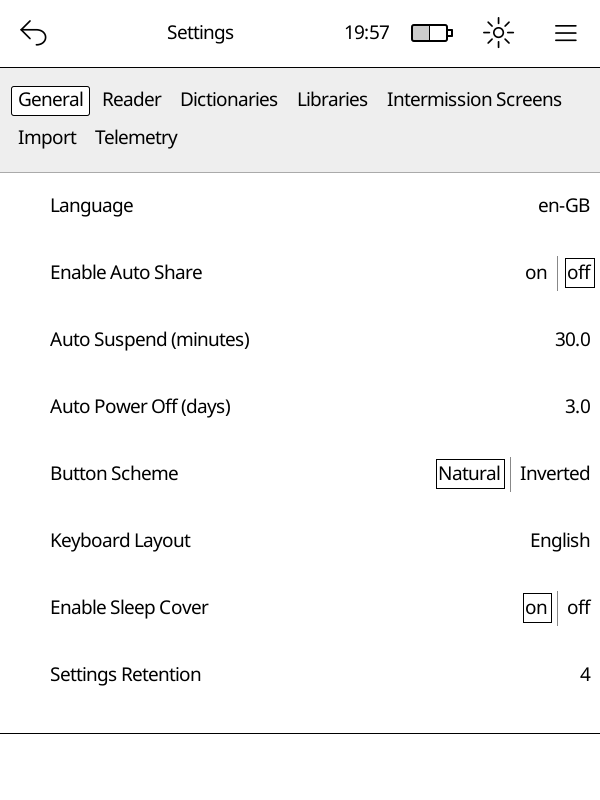
Categories
- General — language, sleep, auto-suspend, button layout, startup mode
- Reader — what happens when you finish a book
- Libraries — add, edit, or remove your book libraries
- Dictionaries — download and manage offline dictionaries
- Import — control how new books are picked up automatically
- OTA — download Cadmus updates directly to your Kobo
- Telemetry — logging options
Dictionaries
Cadmus supports offline word definitions. You can look up any word while reading by long-pressing it. Dictionaries are stored on your device and work without an internet connection once downloaded.
Cadmus integrates with reader-dict, an open-source project that provides high-quality monolingual dictionaries (where you look up a word and get a definition in the same language) for many languages.
Opening the Dictionaries Tab
Go to Main Menu → Settings → Dictionaries.
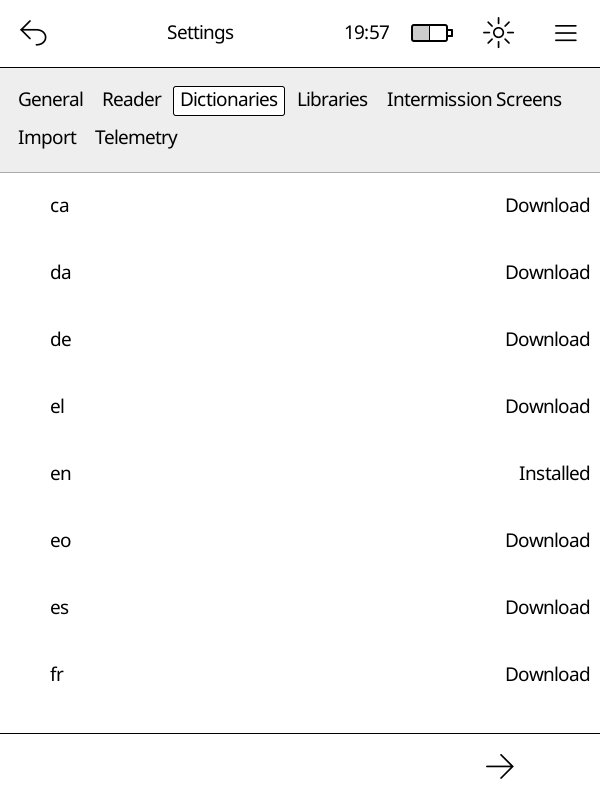
You will see a list of available languages. Each row shows the language code and its current status.
Statuses
| Status | What it means |
|---|---|
| Download | Not yet on your device — tap to download |
| Downloading | A download is in progress |
| Installed | Ready to use |
| Update Available | A newer version is available |
Downloading a Dictionary
Important
Your device must be connected to Wi-Fi before you can download a dictionary.
- Open Main Menu → Settings → Dictionaries.
- Find the language you want.
- Tap Download next to it.
A progress notification appears at the top of the screen while the file downloads. Once the download finishes, Cadmus begins indexing the dictionary automatically.
Updating a Dictionary
When a newer version is available the status shows Update Available.
- Tap the language row.
- Select Update from the menu.
The updated dictionary replaces the old one automatically.
Re-downloading a Dictionary
If a dictionary is already installed you can re-download it to get a fresh copy:
- Tap the language row.
- Select Re-download from the menu.
Deleting a Dictionary
- Tap the language row.
- Select Delete from the menu.
The dictionary files are removed from your device.
How Indexing Works
After you download, update, or re-download a dictionary, Cadmus needs to index it before you can look up words. Indexing reads every word in the dictionary and stores it in a database on disk so that lookups are fast without loading the entire dictionary into memory. This is especially important on devices with limited memory.
A notification with a progress bar appears at the top of the screen while indexing is in progress.
Note
You can keep reading while indexing runs in the background. Words that have already been indexed are available for lookup right away, so you may get partial results until indexing finishes.
What happens when you restart your Kobo
If your Kobo restarts or shuts down while indexing is still running, Cadmus picks up where it left off the next time it starts. It does not start over from the beginning.
When does re-indexing happen
Cadmus automatically re-indexes a dictionary when you:
- Update it to a newer version
- Re-download it
- Delete it (the old index is removed)
You do not need to trigger indexing yourself — it happens automatically whenever the dictionary files change.
Where Dictionaries are Stored
Cadmus stores dictionaries in different locations depending on whether your device has an SD card and whether you are using a test build:
- On devices with an SD card:
- Production:
/mnt/sd/.cadmus/dictionaries/reader-dict/<lang>/ - Test build:
/mnt/sd/.cadmus-tst/dictionaries/reader-dict/<lang>/
- Production:
- On devices without an SD card:
- Production:
/mnt/onboard/.adds/cadmus/dictionaries/reader-dict/<lang>/ - Test build:
/mnt/onboard/.adds/cadmus-tst/dictionaries/reader-dict/<lang>/
- Production:
Each language gets its own subfolder containing a .dict.dz (or .dict) and a .index file.
Note
If your SD card is already inserted when you upgrade Cadmus, your dictionaries are moved to the SD card automatically on the next boot. If you insert an SD card after Cadmus has already run, move the
dictionaries/folder manually — see Moving data to an SD card.
Library
The library is where all your books live. Cadmus scans your device’s storage and keeps track of everything you’ve added, so you can browse, search, and organize your collection right on the device.
What’s in this section
- Importing books — how Cadmus finds and adds books to your library
Importing Books
Cadmus scans your device’s storage and adds books to its database automatically. This process is called importing.
Automatic import on startup
Cadmus automatically imports books every time it starts. The import is incremental: files whose modification time and file size haven’t changed since the last import are skipped, avoiding unnecessary re-fingerprinting. Only new or modified files are processed, significantly improving startup performance for large libraries.
Copy files to your device, restart the app, and they’ll appear in your library right away.
Force full import
If you suspect the import cache is stale or corrupted, you can force a full re-import:
- Open Settings.
- Navigate to the Import section.
- Tap Force Full Import.
- Confirm when prompted.
This bypasses the incremental import cache and re-fingerprints all files in your library directories. Be aware that this can take time and drain the battery for large libraries, so keep your device plugged in while it runs.
Automatic Time Syncing
Cadmus can keep your Kobo’s clock accurate by syncing it automatically whenever WiFi connects.
How it works
When enabled, Cadmus will:
- Detect your timezone based on your IP address.
- Fetch the current time from an internet time server.
- Update the system clock and hardware clock on your Kobo.
After syncing, the clock in the status bar updates immediately.
Enabling automatic sync
Open Main Menu → Settings → General and turn on Auto Time.
You can also enable it manually in your settings file:
auto-time = true
Manual sync
You can trigger a one-time sync without enabling the automatic option:
- Tap the clock in the top bar.
- Select Sync Time.
If the sync fails (for example, WiFi is not connected), a notification will let you know.
Privacy
Note
Time syncing sends a request to
ipapi.coto determine your timezone based on your IP address. No personal data is sent — only your device’s public IP address is visible to that service as part of the network request.
The actual time is fetched from time.cloudflare.com using the standard NTP
protocol.
Automatic Frontlight
Cadmus can automatically adjust your frontlight’s warmth and brightness throughout the day based on the position of the sun at your location.
How it works
When enabled, Cadmus runs a background task that recalculates the ideal frontlight levels every 5 minutes and applies them immediately. The first adjustment happens as soon as the feature starts, and then repeats on every 5-minute mark.
The adjustment has two dimensions:
- Warmth – zero warmth during the day, gradually ramping up to full warmth over a 1.5-hour window around sunset, staying at full warmth through the night, then ramping back down to zero over the 1.5-hour window before sunrise.
- Brightness – unchanged during the day (keeps whatever level you last set).
After sunset brightness drops to
auto-frontlight-night-brightnessand stays there until sunrise.
Enabling automatic adjustment
Open Main Menu → Settings → General and turn on Auto Frontlight.
You can also enable it directly in your settings file:
auto-frontlight = true
See auto-frontlight and related entries
in the Settings reference for all available options.
Manual adjustments pause automation
If you manually change the frontlight level while automatic adjustment is running, Cadmus stops the background task so your chosen level is preserved. Automatic adjustment resumes the next time the app is started.
Location detection
Sun position is calculated from your geographic coordinates. Cadmus obtains
these automatically during each time sync: the same ipapi.co
lookup that resolves your timezone also returns a latitude and longitude, which
are saved to auto-frontlight-last-coordinates in your settings file.
If no coordinates are available yet (for example, before the first successful time sync), automatic adjustment is skipped until a location is known.
Manual coordinates override
If you prefer not to rely on IP-based location, or if the detected location is inaccurate, you can set your own coordinates:
auto-frontlight-manual-coordinates = [51.5074, -0.1278]
Manual coordinates take priority over auto-detected ones.
You can also edit this in Main Menu → Settings → General under Auto Frontlight Manual Coordinates.
Night brightness
The brightness level used after sunset defaults to 1.0 (1%). You can raise
this if you find the screen too dim for nighttime reading:
auto-frontlight-night-brightness = 10.0
The value is a percentage from 0.0 to 100.0.
Privacy
Note
When automatic time syncing is enabled, a request is sent to
ipapi.coto resolve your timezone. That same response includes an approximate latitude and longitude derived from your public IP address, which Cadmus stores asauto-frontlight-last-coordinates.
Database Backup
Cadmus automatically backs up its SQLite database every time it starts.
How it works
When Cadmus starts up it runs through these steps in order:
- Integrity check — Cadmus checks the database file for corruption.
- Version check — Cadmus compares the version stamp stored in the database against the app version and database layout used by the version that is currently running.
- Restore (if needed) — If the database is corrupted, or if it was last written by a newer version of Cadmus than the one running now, Cadmus restores the best available backup before continuing.
- Migrations — Schema and data migrations run against the (possibly restored) database.
- Backup — A fresh backup of the now-migrated database is saved to disk.
Where backups are stored
Backups live in a backups/ folder inside the directory that contains
cadmus.sqlite. A small index file called .cadmus-db-index.toml in that same
folder tracks every backup.
<data dir>/
├── cadmus.sqlite
└── backups/
    ├── .cadmus-db-index.toml
    ├── cadmus-v1.2.0.sqlite
    └── cadmus-v1.3.0.sqlite
Each backup file is named after the Cadmus version that created it, for example
cadmus-v1.2.3.sqlite.
Downgrade protection
When you install an older version of Cadmus on top of a newer one, the database already on disk was written by the newer version.
Cadmus checks whether the older version uses the same database layout as the newer version. If it does, Cadmus keeps using the database normally.
If the database layout changed, Cadmus automatically restores the most recent backup that is compatible with the older version. Data such as reading progress that was only written on the newer version will be lost.
Before the restore happens, the current database file is renamed to
cadmus-<newer-version>-demoted.sqlite in the backups/ folder. This demoted
file is kept on disk indefinitely as a safety net — Cadmus never deletes it
automatically, so you can recover it manually if you ever need to.
Corruption recovery
If the database file fails its integrity check, Cadmus restores the most recent backup and re-runs migrations. The corrupt file is replaced and Cadmus continues normally.
Warning
If the database is corrupted and no backup exists (for example on a fresh install), Cadmus cannot start. You would have to manually delete the database file to allow Cadmus to start.
Controlling how many backups to keep
Use the db-backup-retention setting to control how many backup files are kept
on disk. When a new backup is created and the total number of backups would
exceed this limit, the oldest backups are deleted automatically.
- Default:
2 - Set to
0to disable backups entirely.
db-backup-retention = 2
Troubleshooting
Logs
When something isn’t working right, logs will help with figuring out what went wrong. If you’re reporting an issue, sharing your logs makes it much easier to debug.
Where to find Cadmus logs
Cadmus saves logs in a logs folder. Here’s where to find it on each platform:
| Platform | Stable build | Test build |
|---|---|---|
| Kobo | /mnt/onboard/.adds/cadmus/logs | /mnt/onboard/.adds/cadmus-tst/logs |
Each time you start Cadmus, it creates a new log file with a unique ID. By
default, only the 3 most recent log files are kept — older ones are deleted
automatically. You can change this with the
logging.max-files setting.
The log files look like this:
cadmus-019cf7e3-ef3a-7752-846f-83b92ac90634.json
Finding your run ID
Every time Cadmus starts, it prints a run ID to help you identify which log file belongs to that session. You can find this in:
-
info.log - The startup log in the Cadmus folder. Look for the line that says
Cadmus run started with ID:followed by a string of letters and numbers.For example:
Cadmus run started with ID: 019cf7e3-ef3a-7752-846f-83b92ac90634 (version 0.10.0)
Copy only the UUID part — the string of letters and numbers between ID: and
the (version text.
- Console output - If you’re running Cadmus from a terminal, the same run ID is printed when it starts.
Kernel logs
Kernel logs can be useful to debug lower level system issues, for example a kernel panic, which triggers a device reboot.
Kernel logs are only available in test builds. If you’re using a test build and want to include kernel logs:
- Open Main Menu → Settings
- Go to
Telemetry - Enable kernel logs
- Restart Cadmus
Kernel logs will then be saved in the same log file as your Cadmus logs.
Note
Kernel logs will use more disk space, so don’t forget to turn it back off.
Crashloop recovery
If Cadmus crashes 3 times in a row, it will exit back to Nickel instead of restarting. This prevents the device from getting stuck in an infinite loop of crashes.
When this happens:
- Check
info.login the Cadmus folder for the panic error - The crash counter resets when you start Cadmus manually (using the restart option in the menu or rebooting)
Changelog
0.11.0 (2026-06-22)
⚠ BREAKING CHANGES
- Import: The database options from the library menu have been removed. There is no longer a need to manually flush data. To manually trigger a full import scan, there is a new button in the settings menu under the import category.
- Library: Unsupported files are no longer fingerprinted and indexed into the sqlite DB. This is configured via the
allowed_kindssetting.
Features
- Core: add automatic date and time sync via NTP (#576) (a7fa6e8)
- Core: build SQLite from source with DELETE … LIMIT support (#584) (ac5daf0)
- Device: route data files to SD card (#553) (f19d901)
- Frontlight: auto brightness and warmth (#590) (7e1414d)
- Import: add incremental library import (1ee4218)
- Kobo: enable multi-core when possible (#542) (8817d6e)
- Library: async thumbnail extraction (#517) (86a0a36)
- Reader: support webp via MuPDF (#456) (bf96995)
- Settings Editor: add allowed and dithered file kinds (#545) (ab4e408)
- Settings Editor: confirmation before dictionary downloads (#533) (2ba249b)
- show build provenance in About (#534) (28642f6)
- SQLite: auto database backup and restore (#605) (ddd29c9)
- Startup: open last read file on startup (#592) (a2f89ef)
- Translation: init for French (#509) (786b651)
Bug Fixes
- Import: stop renaming legacy library data files (#538) (b4b106f)
- Library: only import allowed_kinds (45b03c6)
- Notifications: transfer on back navigation (#550) (63349b1)
- OTA: clean bundled assets before ota install (#511) (cf89a70)
- ota: increase artifacts per_page to 50 to avoid pagination truncation (#560) (a5c78cf)
- Settings Editor: Reset dictionary display on download failure (#532) (9415fe5)
Performance Improvements
- Library: due to book cover extraction is part of the indexing process now, you should no longer see app stuttering when navigating the library view. (86a0a36)
- Library: emit import progress in 5% steps (#561) (3184937)
0.10.1 (2026-05-23)
⚠ BREAKING CHANGES
- dictionary: Fuzzy dictionary search no longer corrects first-character typos Fuzzy word lookup now uses a 3-character prefix pre-filter for performance. Searches where the query and the target word differ in the first three characters will no longer return results. For example, searching
"bas"will not suggest"bar". - library: hashes are now calculated using BLAKE3 instead of the custom implementation using mtime which caused inconsistent hashing. BLAKE3 is more CPU and battery intensive, and slower.
Features
- add suspend and power off to exit menu (#330) (6cb9052)
- add WiFi status monitor for Kobo devices (#324) (d89ccaa)
- cadmus: exit to nickel after 3 consecutive crashes (#295) (253edbe), closes #272
- dictionaries: Add download state tracking (#396) (da509ae)
- dictionaries: add native monolingual dictionary support (#378) (9a901a5)
- dictionary: index files into SQLite (#447) (ef75769)
- dictionary: track installed version with cache invalidation (#395) (8de943d)
- i18n: add i18n support for UI strings (#289) (235c494)
- Intermission: add blank screens (#483) (75add0d)
- intermission: add calendar intermission screen (#402) (3f36f25)
- library: Library import is no async. (7fbf304)
- library: switch fingerprints to BLAKE3 content hash (#385) (7b03de3), closes #184
- Settigns Editor: add refresh rate settings (#478) (58cb13e)
- settings editor: add pagination to CategoryEditor (#377) (037c24c)
- Settings Editor: all settings fields are now translatable (51fa0e9)
- settings editor: expose import settings (#341) (5dc926e)
Bug Fixes
- kobo: wake the touch layer on resume (025a013)
- Library: remove books with empty paths on import (#485) (eb6f2a8)
- library: use natural sort order (#370) (f053a28), closes #297
- OTA: use Cadmus tmp dir for OTA downloads (#460) (6fab681)
- settings editor: add hold gesture for library delete (#365) (dbd5f1b), closes #353
- settings editor: wrap category nav bar buttons onto 2 rows (#379) (0848a71)
- Top Menu: make restart and reboot clearer (#293) (402e42d), closes #292
- WiFi: going from Nickel to Cadmus does not interrupt WiFi connection (6bfd7b4)
- WiFi: previous DHCP leases will now be re-used, resulting in stable IP addresses. (6bfd7b4)
Performance Improvements
- Library sorting is now precomputed instead of calculated on demand. Should benefit big libraries. (93cb8a1)
- Memory usage should reduce a tiny bit, as the whole library is no longer loaded in memory. Memory pressure reduction depends on how big the library is to begin with. This will benefit folks with huge libraries. (93cb8a1)
- optimize dictionary loading (#364) (5b23c62)
- startup: Library import is now async, this means that it no longer blocks startup. (7fbf304)
- Startup: Wifi management on startup is now async, instead of sync. This should improve startup speeds. (6bfd7b4)
0.10.0 (2026-03-21)
⚠ BREAKING CHANGES
- Library: With the introduction of SQLite for managing library data, there is no longer a need to set library mode to filesystem or (fake) database. It is all now stored into SQLite. This means this field is obsolete and has been removed.
Features
- add global SQLite database (#189) (6e98d66), closes #151
- Embed documentation in binary (#150) (d865103), closes #112
- Kobo: edit settings file during USB sharing (#227) (c34a202)
- Library: migrate library storage to SQLite (#189) (6e98d66)
- OTA: adaptive chunk sizing based on observed throughput (#228) (d0c9934)
- OTA: add default branch download support (#131) (0c14f6c), closes #114
- OTA: add GitHub device auth flow (#170) (f934733), closes #169
- OTA: support downloading stable releases (#135) (377a087), closes #40
- OTA: version check for stable releases [#256] (85a4ae4), closes #234
- Reader: add go-to-next variant to FinishedAction (#225) (2594a31), closes #152
- Settings Editor: add Telemetry category (#251) (b9fb10c)
- settings: add versioning system (#155) (70d402b), closes #56
- Telemetry: test builds can log kernel logs (#253) (c2d51a1)
Bug Fixes
- Kobo: restart app on USB unplug after sharing (#227) (c34a202), closes #157
- Kobo: set correct CWD in cadmus.sh restart loop (#227) (c34a202)
- Library: navigation bar when switching library (#223) (b421f2b), closes #218
- OTA: change UpdateMode from Gui to Full (#174) (698c1ae)
- OTA: check if network is up before showing view (#232) (1e6d7ef), closes #68
- OTA: close view when tapping outside of dialog (#147) (ddfb738)
- OTA: downloads on slow networks should be more reliable (#228) (d0c9934)
- reported version in about dialog (#160) (5973c84)
- settings editor: library editor (#205) (2739894), closes #203
- USB: redirect log writer to /tmp during USB share (#265) (6ebf2f8), closes #246
0.9.46 (2026-02-04)
Features
- initial settings editor interface (#41) (54267f0)
- PR test builds can be installed via OTA (#57) (0dacb95)
Cadmus Fork
This project is now maintained as Cadmus, a fork of the Plato document reader.
0.9.45 (2026-01-12)
Features
Bug Fixes
Development Environment Setup
Cadmus uses devenv with Nix to provide a reproducible development environment. This guide covers setup on both Linux and macOS.
Prerequisites
- Install Nix with flakes enabled. The easiest way is using the Determinate Nix Installer.
- Install devenv.
Quick Start
-
Clone the repository and enter the devenv shell:
git clone https://github.com/OGKevin/cadmus.git cd cadmus devenv shell -
Download the packaged runtime assets used by Kobo builds:
cargo xtask download-assetsNote
cadmus-coregenerates some compile-time metadata from the bundled asset directories. For Kobo builds, make surebin/,resources/, andhyphenation-patterns/are present beforecargo xtask build-koboso the generated asset list is complete.Thirdparty C/C++ dependencies (MuPDF, libwebp, zlib, etc.) are tracked as git submodules and built automatically by
build.rswhen you runcargo buildorcargo xtask run-emulator. No separate setup step is required. -
Run the emulator:
cargo xtask run-emulator
Available Commands
Once inside the devenv shell, these commands are available:
| Command | Description |
|---|---|
cargo xtask download-assets | Download packaged Plato runtime assets |
cargo xtask test | Run the test suite across the feature matrix |
cargo xtask run-emulator | Run the emulator |
cargo xtask build-kobo | Cross-compile for Kobo device |
cargo xtask dist | Assemble the Kobo distribution directory |
cargo xtask bundle | Package KoboRoot.tgz for installation |
cadmus-dev-otel | Run emulator with tracing and profiling enabled |
devenv up | Start observability stack (Grafana, Tempo, Loki) |
cargo xtask docs | Build documentation portal (mdBook + Cargo docs) |
cadmus-docs-serve | Serve documentation portal locally on port 1111 |
cadmus-translate | Generate the docs translation template (.pot) |
Run cargo xtask --help to see all available subcommands, or cargo xtask <cmd> --help for
options on a specific command.
Or have a look at the rustdocs for xtask here.
Tasks
The devenv environment uses tasks to manage build dependencies.
Tasks are defined in devenv.nix and can be run with devenv tasks run <task>.
Available Tasks
| Task | Description | Dependencies |
|---|---|---|
docs:build | Build documentation EPUB (only rebuilds if files changed) | None |
build:kobo | Build for Kobo device | docs:build |
All tasks delegate to cargo xtask under the hood.
How Tasks Work
Tasks with dependencies automatically run their dependencies first. For example:
# This will first run docs:build (if needed), then build for Kobo
devenv tasks run build:kobo
The docs:build task uses execIfModified to only rebuild when documentation files have actually changed.
Kobo Build Notes
cargo xtask download-assetsmust run beforecargo xtask build-kobo.- OTA updates delete Cadmus-owned bundled files before reboot, then Kobo
extracts the new
KoboRoot.tgzover the install directory. - User files outside the generated Cadmus-owned asset list must be preserved.
Documentation Portal
Cadmus provides a unified documentation portal that combines user guides, API reference, and contribution guides in one place.
Building and Serving Locally
To build the documentation portal:
cargo xtask docs
This runs the full build pipeline:
- Builds the mdBook user guide (
docs/book/html/) - Generates Rust API documentation (
target/doc/) - Builds the Zola landing page and integrates all documentation
To serve the portal locally with live reload:
cadmus-docs-serve
The portal will be available at http://localhost:1111 with automatic rebuilds when you change documentation files or Rust code.
Documentation Structure
The portal provides three integrated sections:
- Landing Page (
/) - Overview and feature highlights - User Guide (
/guide/) - User-facing documentation from mdBook - API Reference (
/api/) - Auto-generated Rust API documentation
All three sections are deployed as a single artifact to GitHub Pages at https://ogkevin.github.io/cadmus/.
Continuous Integration
Documentation is automatically built and validated on every pull request and deployed on push
to main or master. The CI pipeline checks:
- mdBook documentation compiles
- Rust code documentation is valid
- Zola landing page builds successfully
Running Tests
Tests require the TEST_ROOT_DIR environment variable to be set. The easiest way to run the
full test matrix is:
cargo xtask test
This sets TEST_ROOT_DIR automatically and runs tests across all feature combinations. To run
a single feature combination:
cargo xtask test --features "emulator + test"
Or to run tests manually without xtask:
TEST_ROOT_DIR=$(pwd) cargo test
TEST_ROOT_DIR is automatically configured in CI but must be set manually when running
cargo test directly.
Platform Support
Linux (Full Support)
Linux provides full development capabilities including:
- Native development (emulator, tests)
- Cross-compilation for Kobo devices using the Linaro ARM toolchain
- Git hooks (actionlint, shellcheck, shfmt, markdownlint, prettier)
The Linaro toolchain is automatically added to PATH and provides arm-linux-gnueabihf-* commands.
macOS (Full Support)
macOS supports full development capabilities including:
- Native development (emulator, tests)
- Cross-compilation for Kobo devices using the Linaro ARM toolchain
- Git hooks (actionlint, shellcheck, shfmt, markdownlint, prettier)
macOS-Specific Notes
MuPDF build: On macOS, the native build script manually gathers pkg-config CFLAGS for system libraries because MuPDF’s build system doesn’t properly detect them on Darwin.
Observability Stack
The devenv includes a full observability stack for development:
# Start all services
devenv up

# In another terminal, run the instrumented emulator
cadmus-dev-otel
Services available after devenv up:
| Service | URL | Purpose |
|---|---|---|
| Grafana | http://localhost:3000 | Dashboards and exploration |
| Tempo | http://localhost:3200 | Distributed tracing |
| Loki | http://localhost:3100 | Log aggregation |
| Prometheus | http://localhost:9090 | Metrics |
| OTLP Collector | http://localhost:4318 | Telemetry ingestion |
| Pyroscope | http://localhost:4040 | Continuous profiling |
For more details on telemetry, see Telemetry.
Troubleshooting
Shell takes a long time to start
The first devenv shell invocation downloads and builds dependencies, which can take several
minutes. Subsequent invocations are cached and should be fast.
Tests fail with “TEST_ROOT_DIR must be set”
Set the environment variable before running tests:
TEST_ROOT_DIR=$(pwd) cargo test
Local Configuration
Create devenv.local.nix to override settings without modifying the tracked configuration:
{ pkgs, ... }:

{
  env = {
    # Example: Set TEST_ROOT_DIR automatically
    TEST_ROOT_DIR = builtins.getEnv "PWD";
  };
}
This file is gitignored and won’t affect other contributors.
SSH-ing into your Kobo
To enable SSH, mount your kobo normally, and follow the instructions in the file
.kobo/ssh-disabled. The .kobo file is a hidden file, and if using a GUI may
need to enable viewing of hidden files.
To enable ssh:
- Rename this file to ssh-enabled
- Reboot the device
- Connect via: ssh root@<device_ip>
You may find the IP address under ‘More > Settings > Device information’ in Nickel, Kobo’s factory UI.
To connect to your device must not be sleeping. If you fail to connect, make sure Nickel is running.
While Nickel runs as root, adduser is available and functional.
You may use this to create a new user and as that user instead.
ssh-copy-id allows copying your SSH public key to the Kobo,
allowing convenient passwordless login using your key.
As of May 2026, the SSH implementation is OpenSSH (Currently OpenSSH_8.9p1, OpenSSL 3.0.8 7 Feb 2023).
Code Style and Linting
Cadmus enforces a consistent code style across all languages using treefmt for formatting and several linters for static analysis. The pre-commit hooks run all checks automatically, and CI enforces the same rules on every pull request.
Formatters and Linters
| Tool | Languages / Files | Key Configuration |
|---|---|---|
rustfmt | Rust (*.rs) | Workspace rustfmt.toml |
prettier | JSON, YAML, Markdown, CSS, JS | .prettierrc.json |
shfmt | Shell (*.sh, *.bash) | -i 2 -ci (2-space, case-indent) |
shellcheck | Shell (*.sh, *.bash) | .editorconfig |
yamllint | YAML | extends: default, several rules disabled |
rumdl | Markdown (*.md) | Default rules |
actionlint | GitHub Actions workflows | -ignore "rust-toolchain" |
clippy | Rust | -D warnings |
Running treefmt
All formatters run through treefmt. Inside the devenv shell:
# Format all files tracked by treefmt
treefmt

# Check without writing (dry run)
treefmt --fail-on-change
The pre-commit hook (git-hooks.hooks.treefmt) runs treefmt --fail-on-change
automatically on every commit, so format issues are caught before they reach CI.
Rust Style
Formatting
rustfmt with the workspace configuration handles formatting automatically.
Run it via treefmt or directly:
cargo fmt
Linting (Clippy)
Clippy runs with -D warnings — all warnings are errors:
cargo xtask clippy
Clippy runs across every feature flag combination in CI. When adding a new
feature flag, update .github/workflows/cargo.yml to include the new matrix
entries.
Key Conventions
- Prefer
?overunwrap()/expect()in library and app code. - Use iterators over index-based loops.
- Use
&stroverStringin function parameters when ownership is not needed. - Prefer borrowing over cloning.
- Avoid premature
collect()— keep iterators lazy. - Use newtype wrappers over raw primitives for domain concepts.
Shell Style
Shell scripts are formatted with shfmt (-i 2 -ci) and checked with
shellcheck. The -ci flag indents case statement arms relative to the
case keyword:
# Correct — case arms indented with -ci
case "${VAR}" in
  pattern)
    do_something
    ;;
  *)
    fallback
    ;;
esac
Scripts must declare their shell variant. For bash scripts, use:
#! /bin/bash
Structured Logging
Use the tracing crate with structured fields — never string formatting for
log data:
#![allow(unused)]
fn main() {
// Correct
tracing::debug!(pr_number, count, "Found artifacts");

// Wrong
tracing::debug!("[OTA] Found {} artifacts for PR #{}", count, pr_number);
}
See Logging for log level guidance.
Comments
Comment why, not what. Most code needs no comments — good naming is preferred. The rules:
- No inline comments — if one feels necessary, extract the code into a well-named function instead.
- No commented-out code.
- No changelog comments (
Modified by X on date). - No decorative dividers (
//=====). TODO,FIXME,HACK,NOTEannotations are fine with context.
Public API items must have doc comments.
CI Checks
The following CI workflows enforce style:
| Workflow | What it checks |
|---|---|
cargo.yml | rustfmt, clippy (full feature matrix), tests |
shell.yml | shellcheck, shfmt (changed lines only) |
docs-lint.yml | prettier, markdownlint (docs and markdown files) |
CI uses filter_mode: added for shell checks, meaning only lines changed in
the PR are flagged. Running treefmt locally before pushing will catch
everything.
Event System
Cadmus uses a tree-based event system where views are organized hierarchically and events flow through two distinct channels: the Hub and the Bus. Understanding the difference between these channels is essential for implementing correct event handling in views.
Tip
CSS is hard, this page might render better on 80% zoom on smaller screens. I tried to make the mermaid diagrams as big as possible to make them easier to read, which made them overflow a bit.
You might also want to hide the sidebar.
Overview
The UI is a tree of View objects. Each view can have children, forming a hierarchy like:
flowchart TD
    Home["Home (root view)"]
    TopBar["TopBar"]
    Shelf["Shelf"]
    Book1["Book"]
    Book2["Book"]
    BottomBar["BottomBar"]
    Dialog["Dialog ← overlay child"]
    Label["Label"]
    Button["Button"]

    Home --> TopBar
    Home --> Shelf
    Home --> BottomBar
    Home --> Dialog
    Shelf --> Book1
    Shelf --> Book2
    Dialog --> Label
    Dialog --> Button
Events enter the tree from the main loop and travel top-down (root to leaves), with the highest z-level children checked first. Views can communicate back up the tree via the bus, or globally via the hub.
Hub vs Bus
The two channels serve fundamentally different purposes:
flowchart TB
    subgraph MainLoop["Main Loop"]
        rx["rx.recv()"]
        match["match evt { ... }"]
        handle["handle_event(root, &evt, &tx, &bus, ...)"]
        Hub["Hub (tx)"]
        Bus["Bus (VecDeque)"]

        rx --> match
        match -->|dispatches to view tree| handle
        handle --> Hub
        handle --> Bus
        Bus -->|unhandled bus events forwarded to hub| Hub
    end
Hub (Sender<Event>)
The hub is an mpsc::Sender<Event> — a global channel that sends events to the main loop.
Events sent to the hub are processed in the next iteration of the main loop, not immediately.
Use the hub when:
- The event needs to be handled by the main loop directly (e.g.,
Event::Close,Event::Open,Event::Notification) - The event should reach all views in a future dispatch cycle (e.g.,
Event::Focus) - You need to communicate across unrelated parts of the view tree
#![allow(unused)]
fn main() {
// Close a view — handled by the main loop's match statement
hub.send(Event::Close(self.view_id)).ok();

// Show a notification — main loop creates the Notification view
hub.send(Event::Notification(NotificationEvent::Show(msg))).ok();

// Set focus — dispatched to all views in the next loop iteration
hub.send(Event::Focus(Some(ViewId::SearchInput))).ok();
}
Bus (VecDeque<Event>)
The bus is a local VecDeque<Event> that passes events from a child to its parent. Events
placed on the bus are handled synchronously during the current dispatch cycle.
Use the bus when:
- A child needs to communicate with its direct parent
- The parent is expected to handle the event (e.g., a button telling its parent dialog it was pressed)
- The event should bubble up through the view hierarchy
#![allow(unused)]
fn main() {
// Child tells parent about a submission
bus.push_back(Event::Submit(self.view_id, self.text.clone()));

// Child requests parent to close it
bus.push_back(Event::Close(ViewId::MarginCropper));
}
Bus Bubbling
When a bus event is not handled by any ancestor view, it reaches the root and gets forwarded to the hub for processing in the next main loop iteration:
#![allow(unused)]
fn main() {
// End of main loop iteration — unhandled bus events become hub events
while let Some(ce) = bus.pop_front() {
    tx.send(ce).ok();
}
}
Event Dispatch
The core dispatch function in view/mod.rs controls how events flow through the tree:
flowchart TD
    Start["handle_event(view, event)"] --> CheckLeaf{"Is view a leaf<br/>(no children)?"}

    CheckLeaf -->|YES| HandleDirect["call view.handle_event()<br/>return result"]
    CheckLeaf -->|NO| ReverseIter["Step 1 - Iterate children in REVERSE order<br/>(highest z-level first)"]

    ReverseIter --> CheckChildren["For each child:<br/>call handle_event(child, event)"]
    CheckChildren --> Captured{"Child returns true?"}
    Captured -->|YES| SetCaptured["captured = true<br/>BREAK"]
    Captured -->|NO| NextChild["Next child"]
    NextChild --> CheckChildren

    SetCaptured --> ProcessBus["Step 2 - Process child_bus events"]
    CheckChildren -->|No more children| ProcessBus

    ProcessBus --> BusEvent{"For each event<br/>on child_bus"}
    BusEvent --> HandleBus["call view.handle_event(child_evt)"]
    HandleBus --> ViewHandles{"View handles it?"}
    ViewHandles -->|YES| RemoveBus["remove from bus"]
    ViewHandles -->|NO| KeepBus["keep on bus<br/>(bubbles up)"]
    RemoveBus --> BusEvent
    KeepBus --> BusEvent

    BusEvent -->|No more bus events| CheckCaptured{"NOT captured<br/>by any child?"}
    CheckCaptured -->|YES| HandleParent["Step 3 - call view.handle_event(event)<br/>return captured || view's result"]
    CheckCaptured -->|NO| ReturnCaptured["return captured"]
Key Rules
-
Reverse iteration: Children are checked from last to first (highest z-level first). This ensures overlays like dialogs and menus receive events before the views beneath them.
-
Short-circuit on capture: Once a child returns
true, no other children or the parent view receive the event. This is why the Dialog’s outside-tap handler works — it returnstrueto prevent the event from reaching views behind it. -
Parent only runs if uncaptured: The parent’s
handle_eventis only called if no child captured the event (captured || view.handle_event(...)). Ifcapturedistrue, the parent is short-circuited.
Main Loop Event Handling
The main loop (app.rs) receives events from the hub and handles them in two
stages. First, TaskManager gets a chance to observe every event — this is
where ImportLibrary, ImportFinished, and ReindexDictionaries are
intercepted to schedule or coalesce background tasks. Then the event enters the
large match statement, where some events are dispatched into the view tree
and others are handled directly:
flowchart TB
    subgraph MainLoop["Main Loop"]
        direction TB

        Recv["rx.recv() → evt"]
        TaskManager["TaskManager::handle_event()<br/>(ImportLibrary, ImportFinished, ReindexDictionaries)"]

        Gesture["Event::Gesture(Tap/Swipe/...)"]
        GestureAction["Dispatched into view tree via handle_event()"]

        Close["Event::Close(id)"]
        CloseAction["Handled directly:<br/>locate_by_id() + remove"]

        Notification["Event::Notification(...)"]
        NotificationAction["Handled directly:<br/>create/update Notification"]

        Open["Event::Open(info)"]
        OpenAction["Handled directly:<br/>push Reader onto history"]

        Focus["Event::Focus(...)"]
        FocusAction["Dispatched into view tree via handle_event()"]

        Select["Event::Select(...)"]
        SelectAction["Some handled directly,<br/>some dispatched"]

        ImportLibrary["Event::ImportLibrary / ImportFinished / ReindexDictionaries"]
        ImportAction["Handled by TaskManager<br/>(schedules/coalesces tasks)"]

        Recv --> TaskManager
        TaskManager --> Gesture
        TaskManager --> Close
        TaskManager --> Notification
        TaskManager --> Open
        TaskManager --> Focus
        TaskManager --> Select
        TaskManager --> ImportLibrary

        Gesture --> GestureAction
        Close --> CloseAction
        Notification --> NotificationAction
        Open --> OpenAction
        Focus --> FocusAction
        Select --> SelectAction
        ImportLibrary --> ImportAction
    end
Event::Close
Event::Close(ViewId) is handled directly by the main loop using locate_by_id(), which
searches only the top-level children of the root view:
#![allow(unused)]
fn main() {
Event::Close(id) => {
    if let Some(index) = locate_by_id(view.as_ref(), id) {
        let rect = overlapping_rectangle(view.child(index));
        rq.add(RenderData::expose(rect, UpdateMode::Gui));
        view.children_mut().remove(index);
    }
}
}
Key limitation: The main loop can only remove direct children of the root. To close nested views, either:
- Use the parent’s ViewId (via hub): Removes the entire parent container
- Use the bus: Parent handles the close and removes just the specific child
See Why ViewId Matters for Close and Closing Nested Views via the Bus for details.
Practical Example: Dialog Outside-Tap
When a Dialog is tapped outside its bounds, the following sequence occurs:
sequenceDiagram
    actor User
    participant MainLoop as Main Loop
    participant ViewTree as View Tree
    participant Dialog as Dialog
    participant Parent as Parent View

    Note over User,Parent: 1. User taps at (x, y) outside the dialog

    User->>MainLoop: Tap gesture
    Note right of MainLoop: 2. Receives Event::Gesture(Tap(point))
    MainLoop->>ViewTree: Dispatches via handle_event()

    Note over ViewTree: 3. View tree dispatch (reverse child order)<br/>Dialog checked first (highest z-level)

    ViewTree->>Dialog: handle_event()
    Note right of Dialog: - Tap outside self.rect<br/>- Matches outside-tap arm<br/>- Sends Event::Close(self.view_id) to hub<br/>- Returns true (captured)
    Dialog-->>ViewTree: return true (captured)

    Note over Parent: 4. Parent SHORT-CIRCUITED<br/>(captured = true)<br/>Parent's handle_event() never called

    Note over MainLoop: 5. Next main loop iteration
    MainLoop->>MainLoop: Receives Event::Close(dialog_view_id)
    Note right of MainLoop: locate_by_id() finds dialog<br/>in top-level children<br/>Removes dialog from view tree
Why ViewId Matters for Close
When using the hub to close views, locate_by_id() only finds top-level children. If a
dialog is nested inside a parent, you must use the parent’s ViewId — this removes the
entire parent:
flowchart TD
    Root["Root View"]
    Home["Home"]
    OtaView["OtaView (top-level)"]
    Dialog["Dialog (nested)"]

    Root --> Home
    Root --> OtaView
    OtaView --> Dialog

    Note["hub.send(Event::Close(ViewId::Ota(Main)))<br/>→ Removes OtaView + Dialog"]
To close just the nested view without affecting siblings, use the bus instead (see below).
Closing Nested Views via the Bus
Send Event::Close via the bus to close nested views. Parents handle bus events synchronously
and can remove any child directly:
#![allow(unused)]
fn main() {
// Child sends close via bus
bus.push_back(Event::Close(ViewId::Dialog));
}
sequenceDiagram
participant Child as Button
participant Dialog as Dialog (parent)
participant Grandparent as OtaView
Child->>Child: handle_event()
Child-->>Dialog: bus: Event::Close(ViewId::Dialog)
Dialog->>Dialog: Returns false (not handled)
Dialog-->>Grandparent: Event bubbles up
Grandparent->>Grandparent: Removes Dialog from children
Comparison:
| Method | Code | Handler | Scope |
|---|---|---|---|
| Hub close | hub.send(Event::Close(id)) | Main loop | Top-level children only |
| Bus close | bus.push_back(Event::Close(id)) | Parent view | Any child |
Example implementation:
#![allow(unused)]
fn main() {
impl View for Dialog {
    fn handle_event(&mut self, evt: &Event, hub: &Sender<Event>, bus: &mut Bus, ...) -> bool {
        match *evt {
            // Return false to bubble up so grandparent removes us
            Event::Close(ViewId::Dialog) => false,
            _ => false,
        }
    }
}
}
Summary
| Aspect | Hub | Bus |
|---|---|---|
| Type | mpsc::Sender<Event> | VecDeque<Event> |
| Scope | Global (main loop) | Local (parent-child) |
| Timing | Next loop iteration | Current dispatch cycle |
| Direction | View → Main loop | Child → Parent |
| Unhandled events | Processed by main loop match | Forwarded to hub |
| Use for | Close, Focus, Notifications | Submit, child-to-parent signals |
Telemetry
Cadmus has three related observability paths:
loggingfor structured log export and local log filestracingfor distributed tracing and OTLP exportprofilingfor continuous profiling with Pyroscope
Use this section when you need to understand how those features fit together, what each one depends on, and how to run them locally.
Cadmus assigns each run a unique Run ID using UUID v7. That Run ID ties together local log files, OTLP exports, and profiling data for the same app session.
Pages
Feature flags
tracingenables structured logs, distributed traces, and OTLP export.profilingenables heap and CPU profiling with Pyroscope.telemetryenables bothtracingandprofilingtogether in the app.
Architecture
The telemetry stack is split into three layers:
- Logging writes newline-delimited JSON to disk and can export log records over OTLP.
- Tracing creates spans around instrumented operations and exports them over OTLP.
- Profiling samples CPU and heap activity and pushes profiles to Pyroscope.
When telemetry is enabled, Cadmus runs all three paths together. In local
development this matches the default observability stack exposed by
devenv up.
Local setup
The development environment includes a full observability stack. Use the
cadmus-dev-otel command to run the emulator with telemetry enabled.
Logging
Cadmus writes structured JSON logs to disk and can export logs to an OTLP
backend when the tracing feature is enabled.
What it does
- Writes newline-delimited JSON log files to the configured log directory
- Adds run metadata so a single app session can be traced through log output
- Optionally exports logs to an OpenTelemetry collector
Feature flag
tracingenables OTLP log export and shared tracing/logging context
Log file format
Cadmus writes newline-delimited JSON files named like this:
cadmus-<run_id>.json
Each record includes these fields:
timestampleveltargetfieldsspans
The spans array carries active tracing context so log records can be matched
back to the traced operation that emitted them.
Resource attributes
When OTLP export is enabled, log records include the same resource metadata as traces:
service.name = cadmusservice.version = <git describe output>cadmus.run_id = <uuid-v7>hostname = <system hostname>
Configuration
See the settings reference for the full logging configuration. The main options are:
logging.enabledlogging.levellogging.max-fileslogging.directorylogging.otlp-endpoint
OTEL_EXPORTER_OTLP_ENDPOINT overrides logging.otlp-endpoint when both are
set.
RUST_LOG overrides the configured log level. This is useful when you need
trace-level output for a single subsystem without editing Settings.toml.
# Enable debug logs globally
RUST_LOG=debug cargo run --features tracing

# Enable trace logs for a specific module
RUST_LOG=cadmus_core::view=trace,info cargo run --features tracing
Runtime behavior
When tracing is enabled, log export is initialized during app startup and
shut down during app exit.
Cadmus always writes local JSON logs. OTLP export is an additional sink layered on top when an endpoint is configured.
Related docs
Tracing
Cadmus uses tracing instrumentation to capture execution flow through the
app and export spans to an OTLP backend.
What it does
- Adds spans around key operations in the app and core crates
- Captures timing, fields, and parent-child relationships between spans
- Exports traces to an OpenTelemetry collector when configured
Feature flag
tracingenables tracing support in the codebase
Instrumentation
Most view and runtime chokepoints are instrumented with conditional compilation so tracing can be compiled out when the feature is disabled.
Each instrumented function can capture:
- function and module name
- selected input fields
- execution duration
- return values at
TRACElevel - parent-child span relationships
View code is instrumented around two high-value paths:
handle_eventmethods for event flow through the UI treerendermethods for rendering and layout timing
For detailed instrumentation conventions, see
.github/instructions/rust-instrumentation.instructions.md.
Example: instrument a function
Use #[cfg_attr(feature = "tracing", tracing::instrument(...))] on functions
that should create a span for each call.
#![allow(unused)]
fn main() {
#[cfg_attr(
    feature = "tracing",
    tracing::instrument(skip(self, data), fields(book_id, size = data.len()))
)]
fn save_cover(&self, book_id: i64, data: &[u8]) -> Result<(), Error> {
    tracing::debug!(book_id, "Saving cover image");

    self.storage.save(book_id, data)?;

    Ok(())
}
}
Use skip(...) for large values, borrowed buffers, or types with noisy Debug
output. Add fields(...) for the identifiers you will actually query in Tempo
or logs.
Example: instrument a closure
For a short synchronous closure, create a span and run the closure inside it
with in_scope().
#![allow(unused)]
fn main() {
let sorted = tracing::info_span!("sorting", entry_count = entries.len()).in_scope(|| {
    let mut entries = entries;
    entries.sort_unstable();
    entries
});
}
This is the usual pattern when you want to time a single closure body without extracting it into a separate function.
OTLP export
When tracing is enabled, Cadmus initializes a tracer provider that exports to
<endpoint>/v1/traces using batch span processors.
This gives you distributed traces in backends like Tempo, Jaeger, or any other OTLP-compatible collector.
Resource attributes
Each exported span includes shared process metadata:
service.name = cadmusservice.version = <git describe output>cadmus.run_id = <uuid-v7>hostname = <system hostname>
Configuration
See the settings reference for the full
logging and OTLP configuration. The main option is logging.otlp-endpoint.
OTEL_EXPORTER_OTLP_ENDPOINT overrides logging.otlp-endpoint when both are
set.
To build Cadmus with tracing support:
cargo build --features tracing
Related docs
Profiling
Cadmus supports continuous profiling with Pyroscope when the profiling
feature is enabled.
What it does
- Uses jemalloc heap profiling for allocation data
- Uses pprof for CPU profiling data
- Pushes both profile types to Pyroscope
Feature flags
profilingenables profiling support in the codebasetelemetryenables profiling together with tracing
Runtime behavior
Profiling is initialized during app startup and shut down during app exit. If a Pyroscope endpoint is configured, Cadmus starts collecting profiles right away so early startup work is included.
The app configures jemalloc as the global allocator when profiling is enabled
and enables heap profiling at process startup. CPU profiling runs alongside it
through the Pyroscope agent.
Configuration
See the settings reference for the full logging and profiling configuration.
logging.pyroscope-endpointPYROSCOPE_SERVER_URL
PYROSCOPE_SERVER_URL overrides logging.pyroscope-endpoint when both are
set.
To build Cadmus with profiling support:
cargo build --features profiling
To build Cadmus with tracing and profiling together:
cargo build --features telemetry
Profile types
Cadmus currently exports:
- heap allocation profiles via jemalloc
- CPU profiles via pprof-rs
Both profile streams are pushed to the configured Pyroscope server.
Local development
The cadmus-dev-otel command starts the emulator with profiling enabled and
the local Pyroscope service available at http://localhost:4040.
With the full devenv stack running, traces go to Tempo, logs go to Loki, and profiles go to Pyroscope. That makes it possible to correlate a single run across all three observability backends.
Documentation Deployment
Cadmus documentation is deployed to Cloudflare Pages.
URLs
- Production: https://cadmus-dt6.pages.dev/
- PR Preview:
https://pr-{NUMBER}.cadmus-dt6.pages.dev/
Reviewing Documentation Changes
When you open a pull request that modifies documentation files, a preview deployment is automatically created. The PR will show a deployment status with a link to the preview URL.
Preview URLs follow the pattern: https://pr-{NUMBER}.cadmus-dt6.pages.dev/
Local Development
Building and Serving
Build and serve documentation locally:
devenv shell
cargo xtask docs        # Build all documentation
cadmus-docs-serve       # Serve at http://localhost:1111
cargo xtask docs handles the full pipeline: installing Mermaid assets, building mdBook,
generating Rust API docs, and assembling the Zola portal. Pass --mdbook-only to skip the
Zola step when you only need to check the mdBook output.
To serve with live reload after building:
cd docs-portal && zola serve --base-url http://localhost
Build Process
Documentation is built from three sources:
- mdBook (
docs/) - User and contributor guides - Cargo doc (
crates/) - Rust API documentation - Zola (
docs-portal/) - Documentation portal that combines everything
The build is orchestrated by cargo xtask docs (see xtask/src/tasks/docs.rs). The GitHub
Actions workflow (.github/workflows/cadmus-docs.yml) runs this command automatically on every
push to main and for every pull request.
Translations
Cadmus has two separate translation systems, each covering a different part of the project.
| What | System | Files |
|---|---|---|
| Documentation | GNU gettext / PO | docs/po/*.po |
| UI strings | Fluent (FTL) | crates/core/i18n/**/*.ftl |
Pick the guide that matches what you want to translate.
Translating Source Strings
The Cadmus UI uses Fluent for all user-visible strings. Translations are embedded directly into the binary at compile time — no external files are needed on the device.
How it works
- FTL files live under
crates/core/i18n/<lang-tag>/cadmus_core.ftl. - The fallback language is en-GB; any string missing from a translation falls back to the English text automatically.
crates/core/src/i18n.rsloads the correct language at startup based onsettings.locale.- The
fl!("message-id")macro resolves message IDs at compile time.
Adding a new language
1. Create the FTL file
Create a new file at the path matching the BCP 47 tag for your language:
crates/core/i18n/<lang-tag>/cadmus_core.ftl
For example, for French:
crates/core/i18n/fr/cadmus_core.ftl
2. Copy and translate the English strings
Use the English fallback file as your starting point:
crates/core/i18n/en-GB/cadmus_core.ftl
Translate each message value. The message ID (left of =) must stay
unchanged — only the value (right of =) changes:
# en-GB
startup-loading = Cadmus starting up…

# fr
startup-loading = Chargement de Cadmus…
3. Set the locale in Settings
To activate the new language locally during development, add a locale key to
your Settings.toml:
locale = "fr"
4. Build and verify
cargo check -p cadmus-core
The fl!() macro validates all message IDs at compile time. A successful build
confirms the FTL file is well-formed and all IDs referenced in code are present.
Adding a string to the source code
When you add a new UI string:
-
Add the message to
en-GB, and any other languages you know how to translate it into. -
Use the
fl!()macro in the Rust source:#![allow(unused)] fn main() { let label = crate::fl!("my-new-message"); } -
For messages with variables, use named arguments:
# In the FTL file
books-loaded = Loaded { $count } books
#![allow(unused)] fn main() { let label = crate::fl!("books-loaded", count = book_count); }
FTL file format
Fluent uses a straightforward syntax. A few rules to keep in mind:
- Message IDs use
kebab-case. - Values can span multiple lines by indenting continuation lines.
- Use Unicode characters directly — no escaping needed.
- Comments start with
#.
For the full syntax reference see the Fluent syntax guide.
Translating Cadmus Documentation
This guide explains how to translate the Cadmus documentation into other
languages. Translations live in docs/po/ as standard GNU gettext PO files.
Prerequisites
If you are using the devenv environment, all required tools are already
available:
mdbook-xgettext/mdbook-gettext— string extraction and preprocessingmsginit/msgmerge/msgfmt— gettext utilities (fromgettext)poedit— graphical PO editor
Install them outside devenv from the vendored fork with
cargo install --path thirdparty/mdbook-i18n-helpers/i18n-helpers --locked and
your system’s gettext package.
Adding a new language
1. Extract the POT template
Run the cadmus-translate script (devenv) or the equivalent command:
cadmus-translate
This writes docs/po/messages.pot — the source template every translation
derives from. Commit this file whenever the English source changes so
translators have an up-to-date starting point.
2. Create a PO file for your locale
# Replace 'fr' with the BCP 47 language tag you are adding.
msginit --input=docs/po/messages.pot \
        --output-file=docs/po/fr.po \
        --locale=fr
Open docs/po/fr.po and set the Language-Name header so the language picker
displays a readable label:
"Language-Name: Français\n"
The xtask reads this header when generating locales.json; without it the
locale code (e.g. fr) is shown instead.
3. Translate the strings
Open the PO file in Poedit or any text editor and fill in each msgstr:
msgid "Welcome to Cadmus!"
msgstr "Bienvenue dans Cadmus !"
Preserve Markdown formatting — bold, code spans, links — exactly as in the
msgid. Untranslated or fuzzy entries fall back to the English source.
4. Build and preview
# Build everything including translated books
cargo xtask docs --base-url http://localhost

# Serve
cd docs-portal
zola serve
Navigate to http://localhost:1111/guide/ and use the language picker in the sidebar
to switch to your locale.
Keeping translations up to date
When English source files change, regenerate the template and merge new strings into existing PO files:
cadmus-translate                    # regenerate docs/po/messages.pot
msgmerge --update docs/po/fr.po docs/po/messages.pot
Excluding content from extraction
Two forms are available depending on how much content you need to skip.
Single block
Use <!-- i18n:skip --> before a single block (paragraph, code block, table):
<!-- i18n:skip -->

This paragraph will not appear in the POT file.
Range
Use <!-- i18n:skip-start --> / <!-- i18n:skip-end --> to exclude multiple
consecutive blocks, or an entire file section:
<!-- i18n:skip-start -->

This paragraph is excluded.

And so is this one.

<!-- i18n:skip-end -->
When the skip directives appear inside an ordered or unordered list, indent them to match the list continuation level so markdownlint does not treat them as list-breaking elements:
1. Step one.

   <!-- i18n:skip-start -->

   | Path | Value |
   | ---- | ----- |
   | `/mnt/onboard` | stable |

   <!-- i18n:skip-end -->

2. Step two.
How the build works
cargo xtask docscallsmdbook build -d book/<lang>for each.pofile found indocs/po/, passingMDBOOK_BOOK__LANGUAGE=<lang>.- The
[preprocessor.gettext]indocs/book.tomlsubstitutes translated strings at build time. locales.jsonis written todocs/book/html/with the available locales;lang-picker.jsfetches it at runtime to populate the language dropdown.- Symlinks under
docs-portal/static/guide/<lang>/expose each locale build to Zola so it is served at/guide/<lang>/.
SQLite & SQLx
Cadmus uses SQLite as its embedded database and SQLx as the Rust database library. SQLx provides compile-time SQL verification — every query is checked against the real schema before the code ships.
The .sqlx directory
The .sqlx/ directory at the repository root contains one JSON metadata file
per SQL query. Each file stores the resolved column names, types, and parameter
types that SQLx inferred from the live database schema at the time
cargo sqlx prepare was last run.
.sqlx/
├── query-10c2db2a….json   ← compile-time metadata for one query
├── query-13c26d81….json
└── …
Regenerating query metadata
After adding or changing any SQL query, regenerate the metadata:
cargo sqlx prepare --all --workspace
This connects to the database, re-introspects every query macro in the
workspace, and rewrites the .sqlx/ JSON files. Commit the updated files
alongside your code change.
Important
If you forget to run
cargo sqlx prepare, the CIcheckjob will fail because the cached metadata will be out of date with your query changes.
Compile-time SQL checking
SQLx’s typed query macros (query!, query_as!, query_scalar!) verify SQL at
compile time using the metadata in .sqlx/. This means:
- Typos in column names are compiler errors, not runtime panics.
- Binding the wrong type to a
?placeholder is a type error. - Adding or removing a column in a migration without updating queries is caught before deployment.
The macros require the DATABASE_URL environment variable to point at a live
database when running cargo sqlx prepare, but not during regular cargo build or cargo check — those use the pre-generated .sqlx/ files.
Important
.sqlx/is only used when theSQLX_OFFLINE=truefield is set which is the default if you’re using devenv.nix.
Review rules
The following rules are enforced during code review for all SQLx queries.
Use typed macros only
Always use the typed macros. Never call the untyped query(), query_as(), or
query_scalar() functions:
| Goal | Use |
|---|---|
INSERT, UPDATE, DELETE, raw SELECT | sqlx::query! |
SELECT mapped into a named struct | sqlx::query_as! |
Single-column SELECT | sqlx::query_scalar! |
When the column is nullable, call .flatten() on the result to collapse
Option<Option<T>> into Option<T>:
#![allow(unused)]
fn main() {
let id: Option<i64> =
    sqlx::query_scalar!("SELECT id FROM libraries WHERE path = ?", path)
        .fetch_optional(pool)
        .await?
        .flatten();
}
List explicit column names
Never use SELECT *. Always name every column you need:
-- ✅ Good
SELECT id, path, name FROM libraries WHERE id = ?

-- ❌ Bad
SELECT * FROM libraries WHERE id = ?
Store timestamps as Unix epoch integers
All date/time values must be stored as INTEGER NOT NULL (Unix epoch seconds).
Do not use TEXT columns for timestamps:
-- ✅ Good
created_at INTEGER NOT NULL

-- ❌ Bad
created_at TEXT NOT NULL DEFAULT (datetime('now'))
Add only indexes that are actively used
Every index must be used by at least one query in the codebase. Unused indexes waste write performance and storage without any read benefit. Before adding an index, verify a query filters, sorts, or joins on the indexed column(s).
Keep schema migration files stable
cadmus-core hashes every file under crates/core/migrations/ at build time
and stores that hash in the database version stamp. Downgrade protection uses
the hash to allow newer-to-older app version moves only when both builds have
the same schema migration set.
Do not edit a schema migration after it has shipped. Add a new numbered migration instead so existing databases keep passing SQLx migration checksum validation.
API reference
The primary database types live in the cadmus_core::db module:
cadmus_core::db::Database— the top-level sync/async bridge that owns the connection poolcadmus_core::db::migrations::MigrationRunner— executes all pending runtime migrationscadmus_core::migration!— macro for declaring one-time runtime migrations
See Library Database for how the library subsystem uses the database, and Runtime Migrations for how to write one-time data migrations.
Library Database
Cadmus stores library roots, scanned files, book metadata, reading progress, thumbnails, and table-of-contents data in SQLite. This page explains where each category of library data belongs and how scans move data from disk into the database.
Core Shape
The library database separates four concerns:
erDiagram
    libraries ||--o{ library_books : contains
    books ||--o{ library_books : appears_in
    books ||--o{ book_authors : has
    authors ||--o{ book_authors : names
    books ||--o{ book_categories : tagged_with
    categories ||--o{ book_categories : names
    books ||--o| reading_states : tracks
    books ||--o| thumbnails : caches
    books ||--o{ toc_entries : contains
    toc_entries ||--o{ toc_entries : parent
Libraries
libraries represents scan roots. A row answers: “which directory did Cadmus
index as a library?”
Keep library-level data here only when it describes the library itself, such as its path, display name, or creation metadata.
Library Membership
library_books connects a library to the book files found under it. It is the
place for data that depends on a specific file within a specific library scan,
including relative paths, absolute paths, timestamps, sizes, and other scan-cache
metadata.
This table is deliberately separate from books because one canonical book can
appear in more than one library or at more than one path over time. File-system
state belongs to the membership row, not to the canonical book row.
Canonical Books
books is the canonical per-book record, keyed by fingerprint. It holds data
that should be the same regardless of which library found the file, such as
title and file kind.
Per-book tables reference books and are removed with the book when cascading
deletes apply. New per-book data should usually live in a dedicated table rather
than being mixed into library membership.
Derived Per-Book Data
Authors, categories, reading state, thumbnails, and table-of-contents entries are derived from either metadata extraction, reader state, or generated assets. They are tied to the canonical book fingerprint, not to a specific library path.
Use join tables for many-to-many relationships such as authors and categories. Use child tables for optional or repeatable data such as reading state, thumbnails, and TOC entries.
Scan Flow
Library scans move from the filesystem toward canonical book data:
flowchart TD
    root[Library root] --> files[Discover supported book files]
    files --> membership[Update library membership and scan cache]
    membership --> fingerprint[Fingerprint changed or new files]
    fingerprint --> book[Upsert canonical book metadata]
    book --> derived[Refresh derived per-book data]
The membership row is checked before expensive work. If the scan-cache data says the file has not changed, Cadmus can skip re-fingerprinting and metadata extraction. If the file is new or changed, Cadmus updates the canonical book row and any derived data collected during import.
What Goes Where
Use these rules when adding or reviewing library database changes:
| Data kind | Belongs in |
|---|---|
| Library root path or display name | libraries |
| File path inside one scanned library | library_books |
| File modification or size cache | library_books |
| Stable book identity or extracted title | books |
| Data shared by all copies of a book | books or a per-book child table |
| Many-to-many metadata | Named entity table plus join table |
| Reading progress | reading_states |
| Generated cover image | thumbnails |
| Nested table of contents | toc_entries, using parent references and positions |
| Migration bookkeeping | Migration tables managed by the migration runner |
If data describes a file’s current location, put it in library membership. If it describes the book identified by its fingerprint, put it in canonical book data or a per-book child table.
Schema Details
For exact schema details, read the migrations in crates/core/migrations/ in
order. They define the tables, views, indexes, constraints, and data migrations
that exist at each database version.
Data Access
The
cadmus_core::library::db::Db
type is the entry point for library database operations. It wraps the shared
SQLite pool and presents a synchronous API to the rest of the app.
Keep database access behind this layer so callers work with domain types instead of raw SQL rows. For SQLx conventions, type overrides, and migration review rules, see the related pages below.
Related Pages
- SQLite & SQLx — compile-time query verification and review rules
- Runtime Migrations — one-time data migrations using
the
migration!macro
Runtime Migrations
Cadmus has two distinct migration pipelines:
- Schema migrations — plain
.sqlfiles incrates/core/migrations/, applied by SQLx’smigrate!macro at startup. Use these forCREATE TABLE,ALTER TABLE, and similar DDL changes. The core build script hashes these files and embeds the hash in the database version stamp. - Runtime migrations — Rust
async fnblocks declared with themigration!macro. Use these for one-time data operations: backfilling columns, importing legacy files, cleaning up obsolete rows, or any procedural work that goes beyond SQL DDL.
How runtime migrations work
flowchart TD
    ctor["#[ctor] runs at process start"]
    registry["Global REGISTRY HashMap<br>(migration id → async fn)"]
    startup["Database::migrate() called on startup"]
    schema["sqlx::migrate!() — applies .sql files"]
    runner["MigrationRunner::run_all()"]
    table["_cadmus_migrations table<br>(id, executed_at, status)"]
    pending["Filter: id NOT IN already-succeeded rows"]
    exec["Execute each pending migration in id order"]
    record["Record success or failure in _cadmus_migrations"]

    ctor --> registry
    startup --> schema
    schema --> runner
    runner --> table
    table --> pending
    pending --> exec
    exec --> record
At process start the #[ctor] attribute runs for every migration! call and
inserts the migration function into a global HashMap. When Database::migrate
is called during application startup, it first applies all pending SQL schema
migrations, then calls MigrationRunner::run_all(), which:
- Reads
_cadmus_migrationsand collects IDs that already succeeded. - Skips those; runs the remaining ones sorted by ID.
- Records each result (
successorfailed) before moving on. - Continues past failures so one broken migration does not block others.
A failed migration can be retried by deleting its tracking row (see Re-running a migration).
The migration! macro
cadmus_core::migration! takes a
stable string ID and an async fn definition:
#![allow(unused)]
fn main() {
cadmus_core::migration!(
    /// One-line doc comment forwarded to rustdoc.
    "v1_my_migration",
    async fn my_migration(pool: &SqlitePool) {
        sqlx::query!("UPDATE books SET title = TRIM(title)")
            .execute(pool)
            .await?;
        Ok(())
    }
);
}
The macro:
- Generates the
async fnwith the provided body. - Creates a public submodule named after the function that exposes a
MIGRATION_IDconstant — useful for tests and cross-references. - Registers the function in the global
REGISTRYvia#[ctor]so it runs automatically without any manual wiring. - Forwards doc comments onto the generated items so rustdoc picks them up.
- Appends the migration ID and a re-run SQL snippet to the generated docs.
Where to put migration code
Co-locate migrations with the feature they belong to. The library subsystem’s
migrations live in crates/core/src/library/migrations.rs; a hypothetical
reader subsystem would put its migrations in
crates/core/src/reader/migrations.rs.
The module only needs to be declared once so the #[ctor] registration runs.
There is no central registry file to update.
Writing a migration step by step
1. Choose a stable ID
The ID is the primary key in _cadmus_migrations. Once a migration has been
deployed it must never be renamed, because existing installations track it by
this string.
Convention: v<N>_<short_description>, for example v1_backfill_book_language.
2. Create the migration file (or add to an existing one)
#![allow(unused)]
fn main() {
// crates/core/src/my_feature/migrations.rs

use sqlx::SqlitePool;

cadmus_core::migration!(
    /// Backfills the `language` column for books that were imported before
    /// language detection was added.
    "v1_backfill_book_language",
    async fn backfill_book_language(pool: &SqlitePool) {
        sqlx::query!(
            "UPDATE books SET language = 'en' WHERE language = '' OR language IS NULL"
        )
        .execute(pool)
        .await?;

        Ok(())
    }
);
}
3. Use SQLx typed macros
All SQL inside a migration must use the typed macros for compile-time verification (see SQLite & SQLx):
#![allow(unused)]
fn main() {
// ✅ Good — compile-time checked
sqlx::query!("DELETE FROM books WHERE file_path = ?", path)
    .execute(pool)
    .await?;

// ❌ Bad — untyped, bypasses verification
sqlx::query("DELETE FROM books WHERE file_path = ?")
    .bind(path)
    .execute(pool)
    .await?;
}
4. Make it idempotent
Use INSERT OR IGNORE, ON CONFLICT DO NOTHING, or guard with a WHERE clause
so the migration is safe to re-run without corrupting data.
5. Regenerate .sqlx metadata
After adding or changing any query in the migration, regenerate the compile-time metadata:
cargo sqlx prepare --all --workspace
Commit the updated .sqlx/ files alongside your migration code.
Re-running a migration
Delete the tracking row, then restart the application:
DELETE FROM _cadmus_migrations WHERE id = 'v1_my_migration';
The next startup will treat the migration as pending and run it again.
API reference
cadmus_core::migration!— macro for declaring runtime migrationscadmus_core::db::migrations::MigrationRunner— executes all pending registered migrationscadmus_core::db::Database— owns the connection pool and orchestrates both migration stages
Investigations
When something needs investigating, the investigation and its results are documented here. This is to ensure that the investigation is not lost and can be referred to in the future if needed.
| Date | Platform | Title |
|---|---|---|
| 2026-03-24 | Kobo | DHCP IP Address Changes on WiFi Toggle |
DHCP IP Address Changes on WiFi Toggle
After identifying that killing the original dhcpcd and replacing it with
udhcpc caused the issue reported in #51,
I confirmed the fix works in testing but wanted to understand the root cause
before finalising PR #299.
Summary
Investigated the DHCP behaviour by inspecting the running device alongside the KOReader source tree and the original Plato shell scripts.
What is actually running on the device
1074  /libexec/dhcpcd-dbus
1110  wpa_supplicant -D nl80211 -s -i wlan0 -c /etc/wpa_supplicant/wpa_supplicant.conf ...
1120  dhcpcd -d -z wlan0
Nickel uses dhcpcd, not udhcpc. There is no udhcpc running under normal operation.
Why the old script caused a new IP every toggle
The original scripts/wifi-enable.sh (inherited from Plato) always spawned a fresh udhcpc:
[root@monza root]# udhcpc --help
BusyBox v1.35.99.139-g15f7d618e (2021-11-14 22:54:11 CET) multi-call binary.

Usage: udhcpc [-fbqvRB] [-a[MSEC]] [-t N] [-T SEC] [-A SEC|-n]
 [-i IFACE] [-P PORT] [-s PROG] [-p PIDFILE]
 [-oC] [-r IP] [-V VENDOR] [-F NAME] [-x OPT:VAL]... [-O OPT]...

 -i IFACE Interface to use (default eth0)
 -P PORT  Use PORT (default 68)
 -s PROG  Run PROG at DHCP events (default /usr/share/udhcpc/default.script)
 -p FILE  Create pidfile
 -B  Request broadcast replies
 -t N  Send up to N discover packets (default 3)
 -T SEC  Pause between packets (default 3)
 -A SEC  Wait if lease is not obtained (default 20)
 -b  Background if lease is not obtained
 -n  Exit if lease is not obtained
 -q  Exit after obtaining lease
 -R  Release IP on exit
 -f  Run in foreground
 -S  Log to syslog too
 -a[MSEC] Validate offered address with ARP ping
 -r IP  Request this IP address
 -o  Don't request any options (unless -O is given)
 -O OPT  Request option OPT from server (cumulative)
 -x OPT:VAL Include option OPT in sent packets (cumulative)
   Examples of string, numeric, and hex byte opts:
   -x hostname:bbox - option 12
   -x lease:3600 - option 51 (lease time)
   -x 0x3d:0100BEEFC0FFEE - option 61 (client id)
   -x 14:'"dumpfile"' - option 14 (shell-quoted)
 -F NAME  Ask server to update DNS mapping for NAME
 -V VENDOR Vendor identifier (default 'udhcp VERSION')
 -C  Don't send MAC as client identifier
 -v  Verbose
Signals:
 USR1 Renew lease
 USR2 Release lease
udhcpc -S -i "$INTERFACE" -s /etc/udhcpc.d/default.script -t15 -T10 -A3 -b -q > /dev/null &
The -q flag is the core issue. It tells udhcpc to quit immediately after obtaining a lease. The full
lifecycle on every WiFi toggle was:
udhcpcspawned → sendsDISCOVER→ getsOFFER→ sendsREQUEST→ getsACK→ runsdefault.script bound(sets IP, rewritesresolv.conf) → process exits- WiFi disabled →
killall udhcpc default.script→ nothing to kill anyway, already exited - WiFi enabled again → repeat from step 1 with zero memory of the previous lease
Because the process exits after getting the lease, there is no daemon to renew it and no lease file written
anywhere. Busybox’s udhcpc has no lease persistence mechanism. On the next cycle it sends a bare
DISCOVER with no preferred-IP hint (no DHCP Option 50), so the DHCP server is free to hand out any
address from its pool.
Additionally, cadmus.sh (previously plato.sh) was killing Nickel’s already-running dhcpcd at startup:
killall -TERM nickel hindenburg sickel fickel adobehost foxitpdf iink dhcpcd-dbus dhcpcd fmon
So even the stateful daemon that Nickel had set up (which would have requested the same IP again) was
torn down before Cadmus replaced it with a stateless udhcpc -q.
What default.script does
/etc/udhcpc.d/default.script is a minimal Busybox hook called by udhcpc on lease events. The relevant
part:
case "$1" in
    renew|bound|probe)
        /sbin/ifconfig $interface $ip $BROADCAST $NETMASK
        # ... deletes all default routes, adds new ones from $router ...
        echo -n > $RESOLV_CONF          # ← truncates resolv.conf to zero
        for i in $dns ; do
            echo nameserver $i >> $RESOLV_CONF
        done
        ;;
esac
echo network $1 ip="$ip" ... > /tmp/nickel-hardware-status &
Notable behaviours:
- Wipes
resolv.confon everyboundevent. This is why KOReader’sdisable-wifi.shsaves and restoresresolv.confwith an md5 check. This is a safety net againstudhcpc’s script wiping DNS on lease release. - Writes to
/tmp/nickel-hardware-status, which is a FIFO Nickel listens on for network events. KOReader explicitly removes this FIFO (rm -f /tmp/nickel-hardware-status) to prevent scripts hanging when Nickel is not running.
Why dhcpcd produces stable IPs
dhcpcd writes a per-SSID lease file to /var/db/:
/var/db/dhcpcd-wlan0-1.lease
/var/db/dhcpcd-wlan0-2.lease
/var/db/dhcpcd-wlan0-3.lease
/var/db/dhcpcd-wlan0-4.lease
/var/db lives on the root eMMC partition (/dev/mmcblk0p10), not a tmpfs. It survives reboots.
When reconnecting to a known SSID, dhcpcd reads the matching .lease file, parses the previously-held
IP, and sends a DHCP REQUEST directly for that IP (DHCP Option 50: Requested IP Address), skipping
DISCOVER entirely if the lease has not expired. The DHCP server sees a familiar MAC + familiar IP request
and simply ACKs it.
The lease file for the current network encodes 192.x.x.x in the yiaddr field of the saved
BOOTREPLY, which is exactly the IP the device is using right now.
Filesystem layout: what is ephemeral vs persistent
| Path | Type | Persistent? |
|---|---|---|
/tmp | tmpfs | No |
/var/lib | tmpfs (16 KiB) | No |
/var/run | tmpfs (128 KiB) | No |
/var/log | tmpfs (16 KiB) | No |
/var/db | eMMC (mmcblk0p10) | Yes |
/etc | eMMC | Yes |
dhcpcd’s runtime state (/var/run/dhcpcd.pid, /var/run/dhcpcd.sock) is ephemeral as expected, but the
lease database in /var/db/ persists. That is the architectural key.
Why KOReader kills dhcpcd in its startup script but still gets stable IPs
From koreader.sh:
# NOTE: We kill Nickel's master dhcpcd daemon on purpose,
#       as we want to be able to use our own per-if processes w/ custom args later on.
#       A SIGTERM does not break anything, it'll just prevent automatic lease renewal
#       until the time KOReader actually sets the if up itself (i.e., it'll do)...
killall -q -TERM nickel ... dhcpcd-dbus dhcpcd ...
KOReader kills Nickel’s dhcpcd because it wants to start its own instance with custom arguments later via
obtain-ip.sh. Crucially, obtain-ip.sh prefers dhcpcd over udhcpc:
# NOTE: Prefer dhcpcd over udhcpc if available. That's what Nickel uses,
#       and udhcpc appears to trip some insanely wonky corner cases on current FW (#6421)
if [ -x "/sbin/dhcpcd" ]; then
    dhcpcd -d -t 30 -w "${INTERFACE}"
else
    udhcpc -S -i "${INTERFACE}" -s /etc/udhcpc.d/default.script -b -q
fi
The new dhcpcd instance KOReader starts reads the same /var/db/*.lease files and requests the same IP.
Stable address despite the kill/restart cycle.
Why the fix in PR #299 works
The fix is twofold:
-
Remove
dhcpcdfrom the kill list incadmus.sh. Nickel’s runningdhcpcd -d -z wlan0instance survives into the Cadmus session, continuously managing the lease. -
Do not start
udhcpcat all in the native Rust WiFi implementation. No new DHCP client is spawned on toggle, so the already-runningdhcpcdis never displaced.
The result: one long-lived dhcpcd daemon manages the lease for the entire session, renews it in the
background, and requests the same IP on every reconnect using the persisted /var/db/*.lease file.